
“In old-school SharePoint, if you wanted to run some custom code in a web part, workflow, form, or event handler, you wrote either a sandboxed or a farm solution. Neither of these are supported in SharePoint Online. So what are developers supposed to do when they need to run some code somewhere other than the web browser? How can they run code in the background, elevate permissions, or fill gaps in the “out of the box” configuration options?”
That paragraph opens a blog post series by Bob German entitled Calling SharePoint CSOM from Azure Functions.
Following the walkthrough contained in Bob’s posts is how I got started developing Azure Functions that interacted with SharePoint. However, there have been some changes since June 2017 when Bob’s posts were first published. The three major changes are: the ability to develop Azure Functions using Visual Studio, the switch to the new version of app registrations in the Azure portal, and the associated switch from using the Azure Active Directory Authentication Libraries (ADAL) to using the Microsoft Authentication Library (MSAL) to authenticate with Azure AD. In this blog post series I’ll provide an updated version of Bob’s walkthrough, one that uses the current technologies and tooling.
This series will show you how use Visual Studio to develop and deploy an Azure Function that calls SharePoint’s Client-Side Object Model (CSOM).
Part 1 – Registering an application with Azure Active Directory
Part 2 – Developing Azure Functions in Visual Studio
Part 3 – Creating an Deploying an Azure Function App (This Post)
Creating an Deploying an Azure Function App
Creating the Azure Function App
To complete this part of the tutorial you will need an Azure subscription. You can sign up for a trial subscription if you do not already have one.
Navigate to the Azure Portal, select Create a resource in the left-hand navigation, select Compute under Azure Marketplace, then select Function App under Featured.
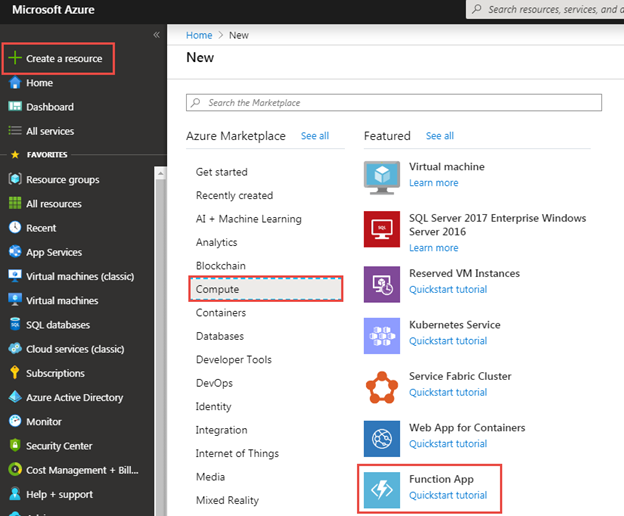
The user interface user to create a function app changed recently, it went from a single dialog to a wizard-type interface.
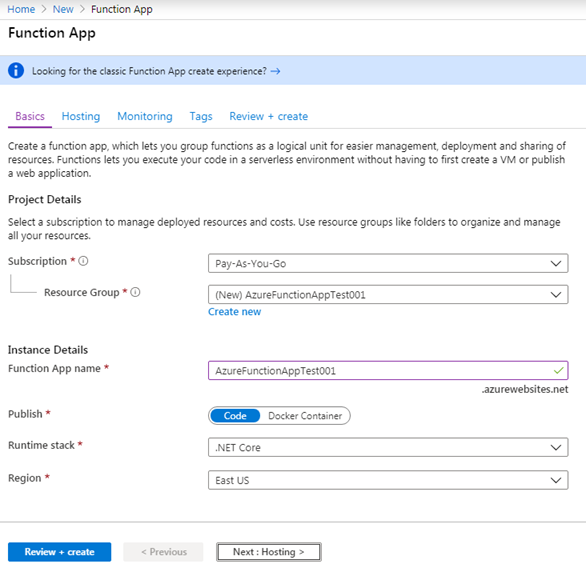
In the Basics page of the wizard, select a subscription, select or create a resource group, and then set a name for the function app. I’ve chosen to create a new resource group that has the same name as the function app: AzureFunctionAppTest001. Use the following values for the remaining settings in the Instance Details section and then click the Next: Hosting button.
- Publish: Code
- Runtime stack: .NET Core
- Region: select a region near you
I should note that, even though you are choosing .NET Core as the runtime stack, the function app will actually be using the full .NET Framework.
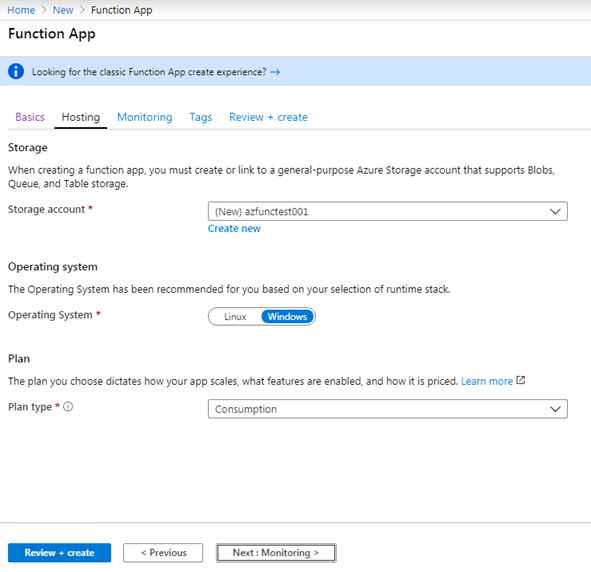
In the Hosting page of the wizard, select or create a new storage account. I chose to create a new storage account named azfunctest001. Leave the default values for the Operating system and Plan type settings. You are also going to use the default values for the settings in the Monitoring and Tabs pages of the wizard so you can skip them by clicking the Review + create button.
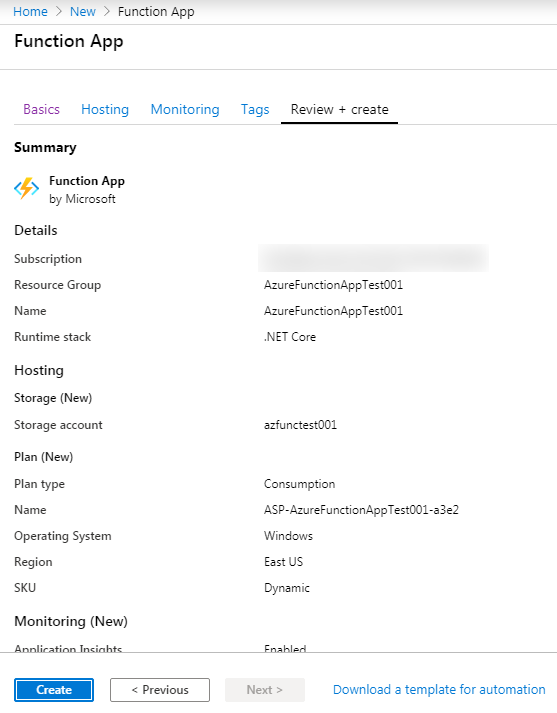
Ensure that you have entered the settings correctly and then click the Create button.
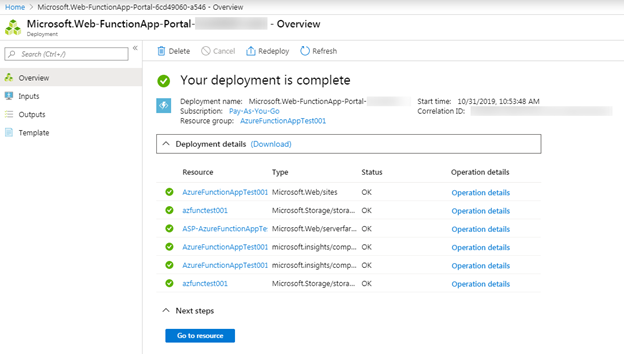
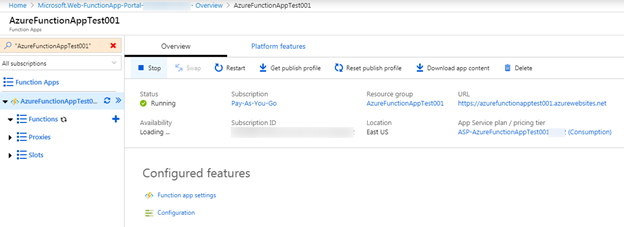
You will be taken to a page that displays the status of the deployment process. This will normally take a few minutes to complete. When you see the Your deployment is complete message, click the Go to resource button to go to the Overview page for the function app.
Updating the GetLists Function Code
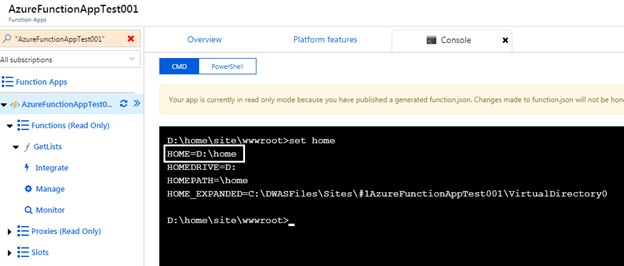
Recall that the GetLists function you wrote in Part 2 of this series uses an Application ID and the private key from a certificate to authenticate with Azure AD. The private key is read from a PFX file exported from a certificate. When you were testing locally you were able to use a local path to the PFX file but now that you will be deploying to Azure you will need to use the path inside the host App Service. One of the Azure Functions platform tools is a console you can use to determine this path. To access the console, select the Platform features tab and then select Console (CMD / PowerShell).

The console opens to the path D:\home\site\wwwroot. This is the root deployment path for the function you built in Visual Studio. The App Service has an environment variable named DEPLOYMENT_TARGET whose value is the path shown above, however my tests indicate that you cannot access this value using code. The App Service also has an environment variable named HOME whose value is the root deployment folder. This environment variable is accessible using code.
Before updating the code to read the remotely hosted PFX file, you will need to add the PFX file to your project. I added the file to the root of the project, but you can add it inside a folder if you like. After adding the PFX file to your project, ensure you set the Copy to Output Directory property for it to Copy if newer.

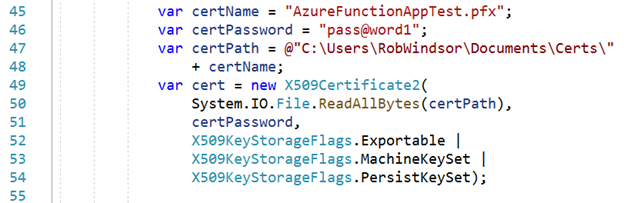
Now you are ready to update the code that gets the X509Certificate2 object for the PFX file. Below is a screen capture of the existing code.
Add the following using statements.
using System;
using System.IO;
Replace the code in lines 47 and 48 in the screen capture above with the following. This code looks for the environment variable named HOME, if it finds the environment variable then it builds the path for the hosting App Service otherwise it builds the local path. Make sure you adjust the code that builds the path for the hosting App Service if you placed the PFX file inside a folder in your project.
var home = Environment.GetEnvironmentVariable("HOME");
var certPath = home != null ?
    Path.Combine(home, @"site\wwwroot", certName) :
    Path.Combine(@"C:\Users\RobWindsor\Documents\Certs\" + certName);
Start a debug session to ensure that the function is still working locally. Once you have it working locally you will be ready to deploy the function to Azure.
Configuring the Azure Function App Runtime
As discussed in Part 2 of the series, there are three major versions of the Azure Functions runtime: versions 1, 2 and 3. The version 1 runtime runs on the .NET Framework 4.6, version 2 of the runtime runs on .NET Core 2.2, and version 3 of the runtime (which is in preview) runs on .NET Core 3.x. At the time of writing of this blog post you are forced to choose the version 1 runtime since the SharePoint Client Object Model library does not currently run on .NET Core.
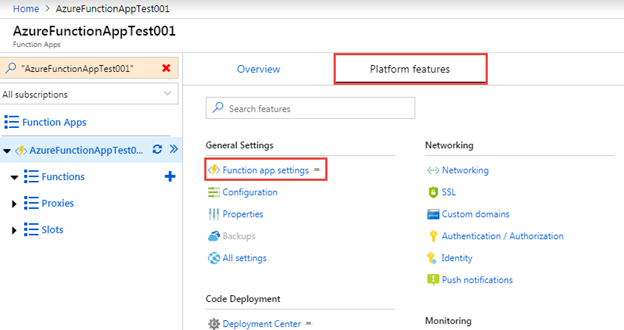
With that in mind, the next step is to configure the function app to use the version 1 runtime. To do this select the Platform features tab, and then select Function app settings.
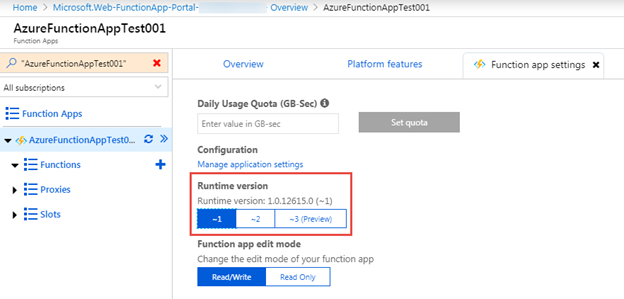
In the Function app settings page, select the ~1 button. It will generally take 30 seconds to a minute for the change to be saved.
Deploying the Function App Using Web Deploy
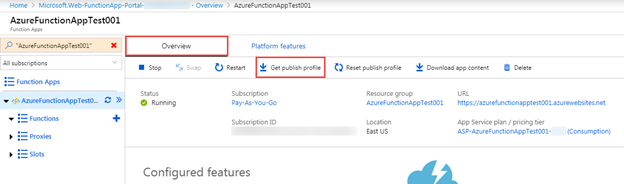
The easiest way to deploy functions to a function app is using Web Deploy. Select the Get publish profile button in the command bar of the Overview tab to download the publish profile.
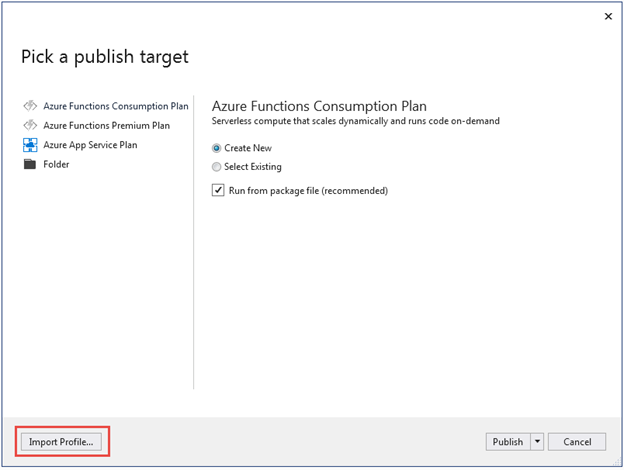
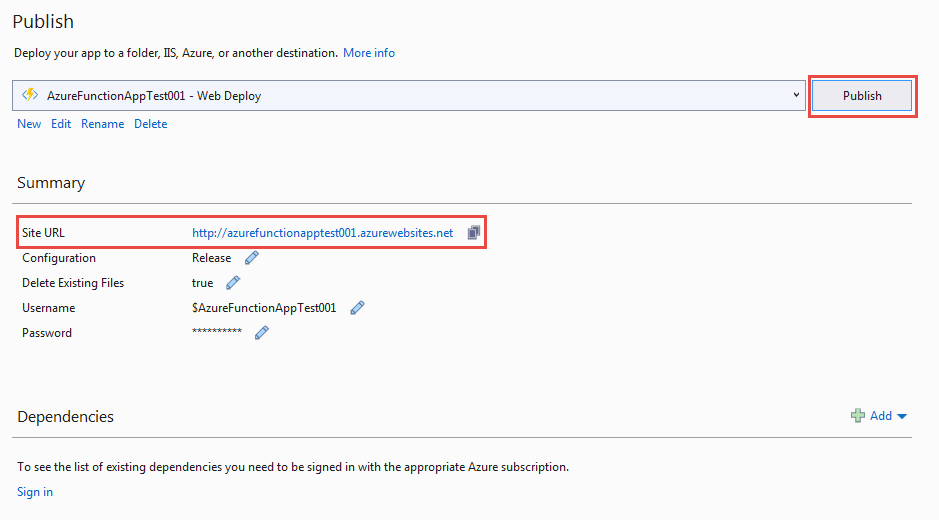
Right-click on the project in the Solution Explorer and select Publish. In the Pick a publish target dialog, select the Import Profile button, find the PublishSettings file you just downloaded, and select OK.
In the Publish dialog, select the Publish button to deploy your function to the function app. The Site URL property will show you the URL to the App Service that will host the function app. In my example the Site URL is https://azurefunctionapptest001.azurewebsites.net. The deployment process should take about 30 seconds to complete.
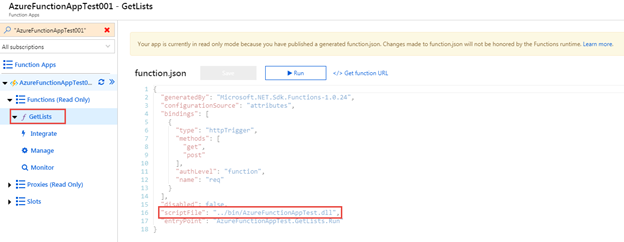
When the deployment is complete, refresh the page for the function app in the Azure portal. You should now see the GetLists function. If you examine the JSON file for the function you can see that it is indicating that the function implementation is contained in a .NET assembly. That assembly is named AzureFunctionAppTest.dll in the screen capture below.
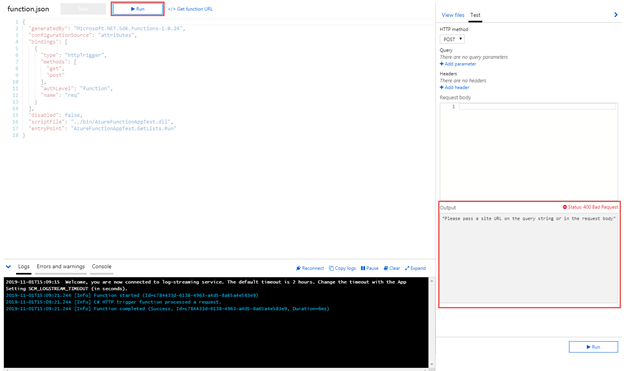
Click the Run button to test the GetLists function. If you examine the Output in the Test panel on the right, you’ll notice that a 400 Bad Request response was returned with the error message, “Please pass a site URL on the query string or in the request body”. This is because we have not configured the test to pass the siteUrl parameter to the function.
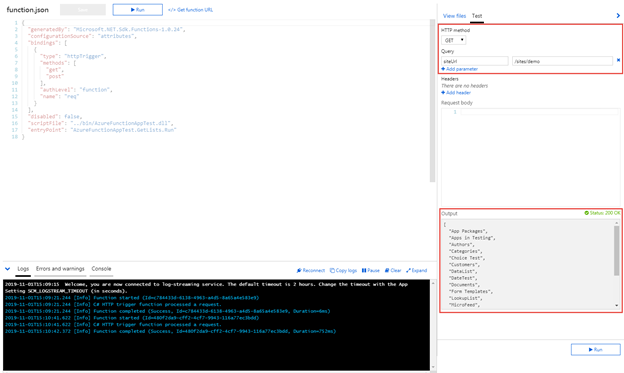
Change the HTTP method from POST to GET, add a new Query parameter, set the name of the query parameter to siteUrl and the value to the server relative URL of one of your SharePoint Online sites, and then click either of the two Run buttons. You should now get a 200 OK response whose body is a JSON array containing the names of the lists in the site you identified.
Testing Outside the Azure Portal
At this point you should have a successful test run inside the Azure Portal. Now let's try to test outside the Azure Portal. As before I will be testing using Fiddler. The URL to a specific Azure Function is the host URL plus /api/ plus the name of the function. That means the URL to the function I've deployed is https://azurefunctionapptest001.azurewebsites.net/api/GetLists. I'll try making a GET request to this URL using Fiddler.

You might expect that I would receive a 400 Bad Request response with the error message, "Please pass a site URL on the query string or in the request body". Instead I received a 401 Unauthorized response.
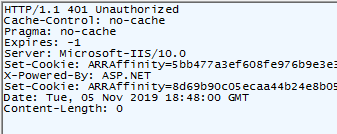
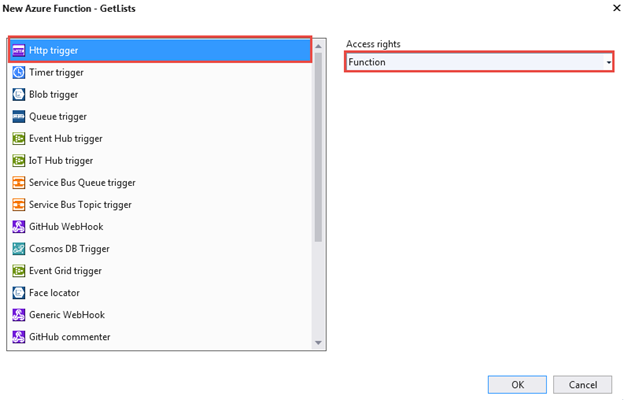
Recall that when I added the GetLists function to my Visual Studio project in Part 2 of the series, I set the Access rights to Function. This is related to why I received the 401 Unauthorized response.
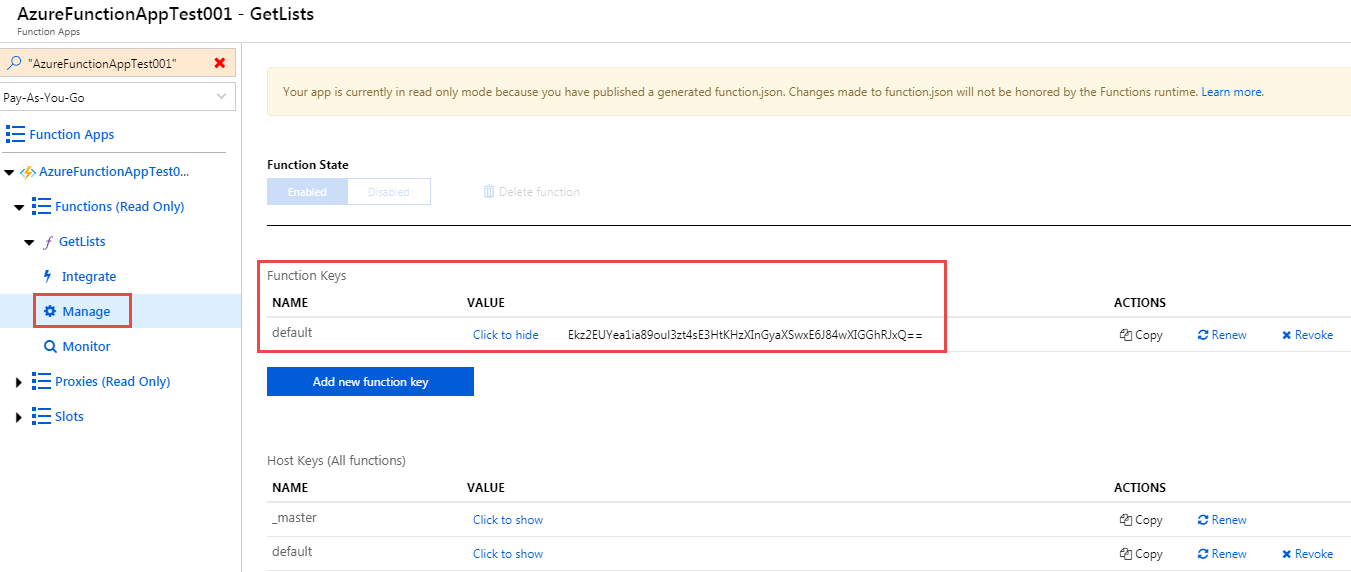
Azure Functions enables you to protect access to functions triggered by an HTTP request using API keys. API Keys are passed to the function using the code query string parameter or the x-functions-key header. If you set the Access rights to Anonymous then no API key is required. If you set the Access rights to Function, then a function specific API key is required. If you set the Access rights to Admin, then an API key which is shared by all functions in the function app is required. You can see and configure the function specific and shared keys via the Manage page for an Azure Function.
When I created the GetLists function, I set the Access rights to Function so I am required to pass the function specific key with any request. I didn't do that in my last test, that I why I received a 401 Unauthorized response.
An easy way to get the full URL, including the API key (if required), is to click the Get function URL link and then click the Copy link in the dialog that appears.
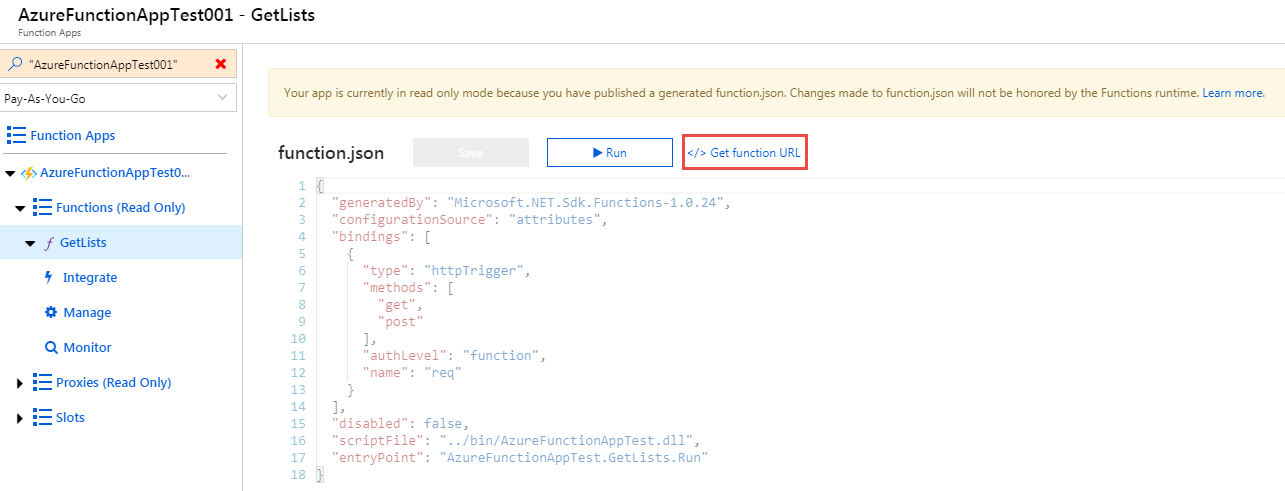
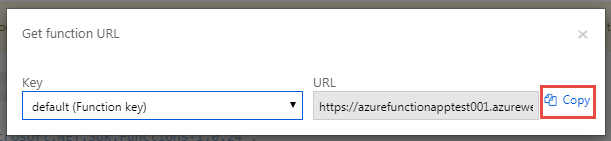
I can then use the Fiddler Composer to make a GET request to the URL that was placed on the clipboard .

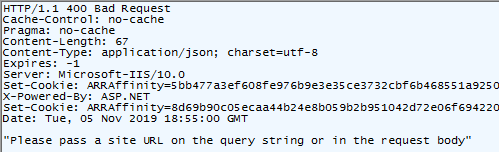
This time I receive a 400 response with the error message, "Please pass a site URL on the query string or in the request body".
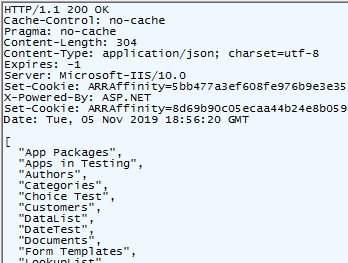
Now all I need to do is add the siteUrl parameter to the query string and execute the request again. After doing so I received the 200 OK response with the JSON array of list names in the body.
Summary
That completes this initial look at developing Azure Functions that interact with SharePoint using Visual Studio. Look for additional blog posts on this topic in the future.