
“In old-school SharePoint, if you wanted to run some custom code in a web part, workflow, form, or event handler, you wrote either a sandboxed or a farm solution. Neither of these are supported in SharePoint Online. So what are developers supposed to do when they need to run some code somewhere other than the web browser? How can they run code in the background, elevate permissions, or fill gaps in the “out of the box” configuration options?”
That paragraph opens a blog post series by Bob German entitled Calling SharePoint CSOM from Azure Functions.
Following the walkthrough contained in Bob’s posts is how I got started developing Azure Functions that interacted with SharePoint. However, there have been some changes since June 2017 when Bob’s posts were first published. The three major changes are: the ability to develop Azure Functions using Visual Studio, the switch to the new version of app registrations in the Azure portal, and the associated switch from using the Azure Active Directory Authentication Libraries (ADAL) to using the Microsoft Authentication Library (MSAL) to authenticate with Azure AD. In this blog post series I’ll provide an updated version of Bob’s walkthrough, one that uses the current technologies and tooling.
This series will show you how use Visual Studio to develop and deploy an Azure Function that calls SharePoint’s Client-Side Object Model (CSOM).
Part 1 – Registering an application with Azure Active Directory (This post)
Part 2 – Developing Azure Functions in Visual Studio
Part 3 – Creating an Deploying an Azure Function App
Registering an application with Azure Active Directory
Creating a Certificate
The first step in registering an application is to generate a certificate that will enable the application to prove its identity using private key cryptography. The certificate will have two keys: a public key and a private key. Everybody knows the public key; in fact they can look it up in Azure AD. Only the application has the private key, and it can prove its identity by decrypting a message that was encrypted using the public key.
PowerShell includes the ability to generate such a certificate (the older makecert utility has been deprecated.) Simply use this command:
New-SelfSignedCertificate -KeyExportPolicy Exportable `
    -Provider "Microsoft Strong Cryptographic Provider" `
    -Subject "CN=[application name]" `
    -NotBefore (Get-Date) `
    -NotAfter (Get-Date).AddYears(2) `
    -CertStoreLocation "cert:\CurrentUser\My" `
    -KeyLength 2048
You can use any X.509 distinguished name as the as the subject; as you’ll see in the screen captures below, I used AzureFunctionAppTest as a common name (CN) for the application. The certificate will be self-signed and will be valid for two years from the current date.
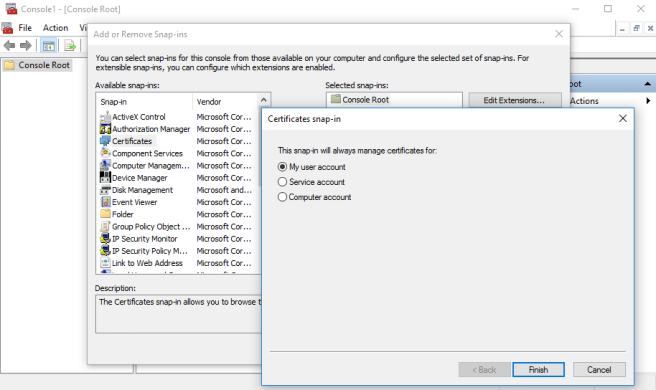
This command will put the certificate in the Windows certificate store for the current user. To get to it on a Windows machine, you need to use the Certificates Microsoft Management Console (MMC) snap-in. Use start/run and type mmc to start the MMC, then add a snap-in for Certificates. Select My user account as the certificate store to manage.
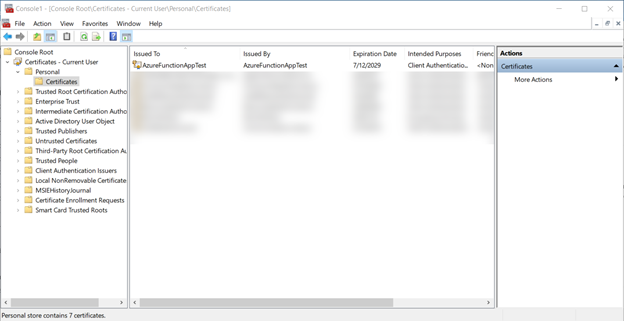
You should find your certificate under Personal/Certificates.
You’ll need to export the certificate twice: once in a format that allows us to get the public key, and once in format that includes the private key. Let’s start with the private key export; right click the certificate, select All Tasks, then Export. Export it as a PFX file including the private key.
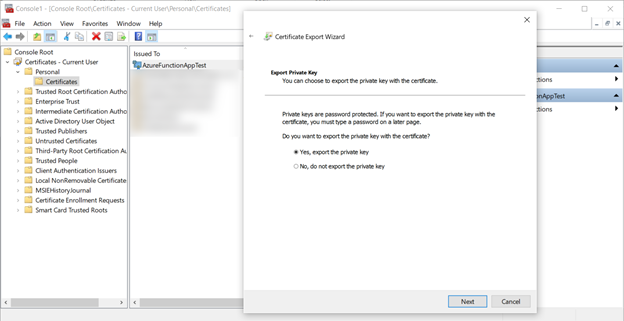
When prompted, enter a password to secure the private key. I used the super secret password pass@word1 for my certificate.
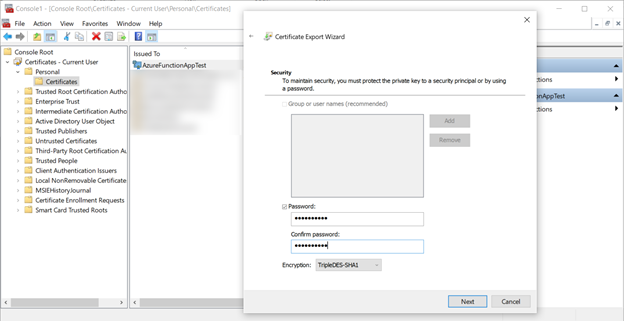
Save the PFX file and password for use in the application.
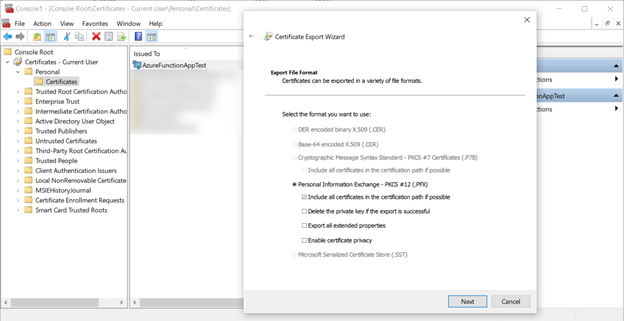
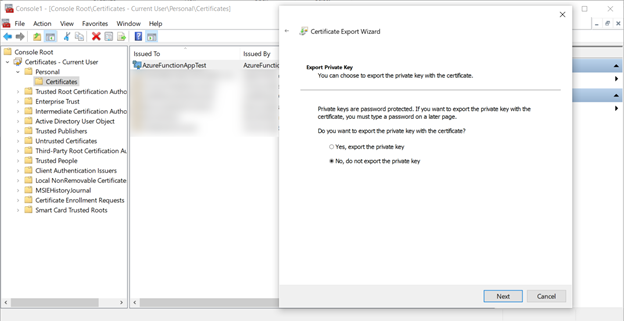
Now export the certificate again, this time with no private key as a CER file using the DER encoded binary format.

Register the Application
Create the Application
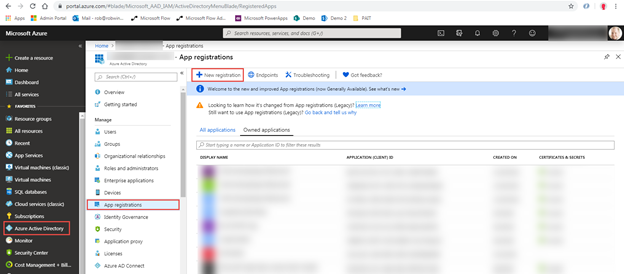
The next step is to register the application in Azure AD. For this exercise, you’ll use the Azure portal. Select Azure Active Directory in the first-level left-hand navigation, select App registrations in the second-level left-hand navigation, and then select New registration in the App registrations command bar.
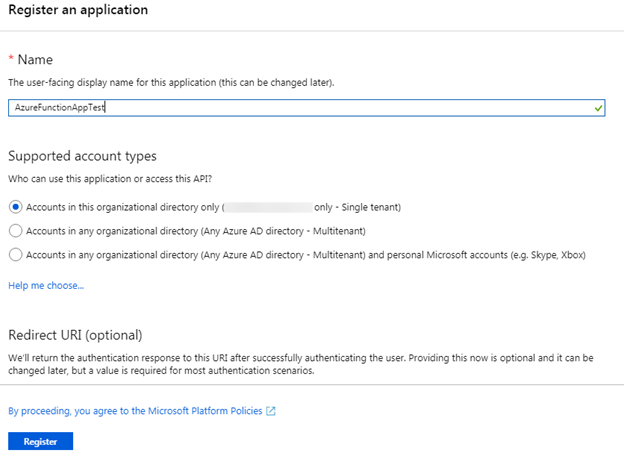
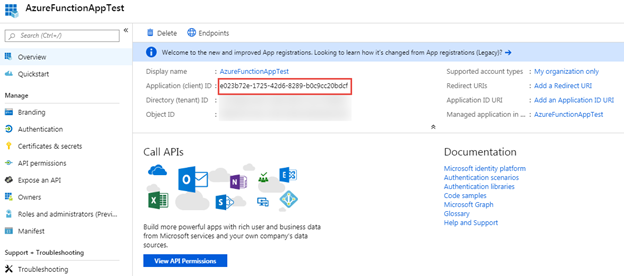
In the Register an application page, set the Name property to something applicable for this walkthrough. As you can see in the screen capture, I set the name to AzureFunctionAppTest. Leave the default values for the other properties and click the Register button to register the application.
Application Credentials
As mentioned previously, the application will have a set of credentials that can be used to authenticate with Azure AD. In this case the credentials will be an Application ID along with the private key from the certificate you created earlier. They are effectively the user name and password for the application.
The Application ID is a GUID that is generated when the application is registered. You can see the Application ID on the Overview page for the application.
Next you need to let Azure know that you will be using the certificate you created earlier as part of the credentials for the application. To do this, select Certificates & secrets in the left-hand navigation for the application, then select the Upload certificate button.
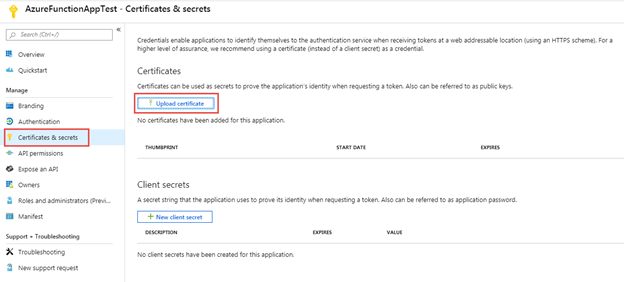
In the Upload certificate dialog, use the file picker to find the CER file you exported earlier and then select the Add button.

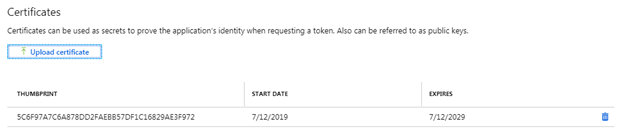
You should see that an entry has been added to the list in the Certificates section.
Permission Requests
The final step in the application registration is to request, and eventually grant, permissions. The Azure Function you are going to build will take the URL to a SharePoint site as a parameter and return the names of all the lists in that site. You have two options for an API to do this, the Microsoft Graph or SharePoint Online (which covers both the REST API and CSOM). We’ll be using SharePoint Online.
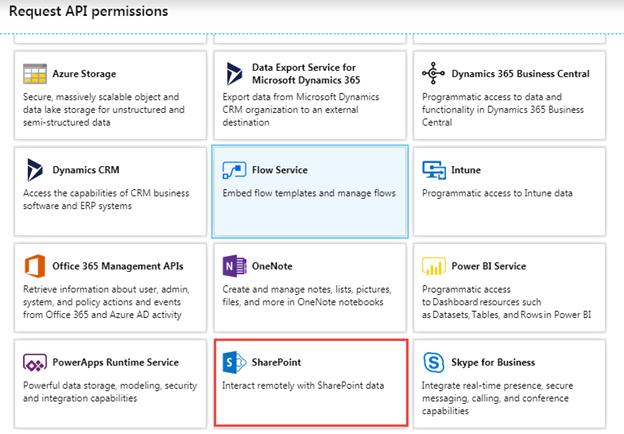
Select API permissions in the left-hand navigation for the application and then select the Add a permission button.

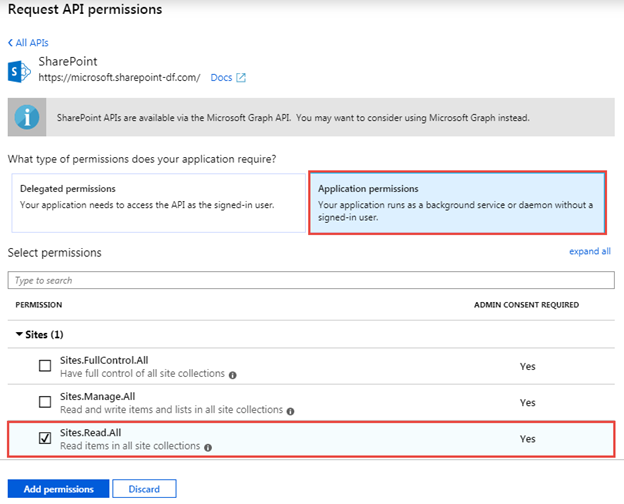
In the Request API permissions panel, scroll down and select SharePoint.
There are two types of permissions you can request here: delegated permissions or application permissions. When using delegated permissions, the application accesses the API as the currently signed-in user. Both the user and the application must have permission to access a resource (e.g. read items in a list). When using application permissions, the application accesses the API as itself and only the permissions of the application are considered when accessing resources.
Application permissions are generally used in situations where there is no signed-in user (e.g. a timer job). However, application permissions can also be used to perform actions that the currently signed-in used may or may not be able to do (e.g. creating a new list). In this way you can do permission elevation.
In this case you are going to request an application permission. Just a reminder that our Azure Function is going to take the URL to a site and return then names of the lists in that site so we’ll need to request a permission that will enable us to read the lists in any site in the tenant.
In the Request API permissions panel, select Application permissions, expand Sites, select the Sites.Read.All permission scope, and then select the Add permission button.
At this point you’ve requested permissions, now you need to grant them. Normally you would do that by navigating to a consent page where you would be presented with a consent dialog that looked like this.
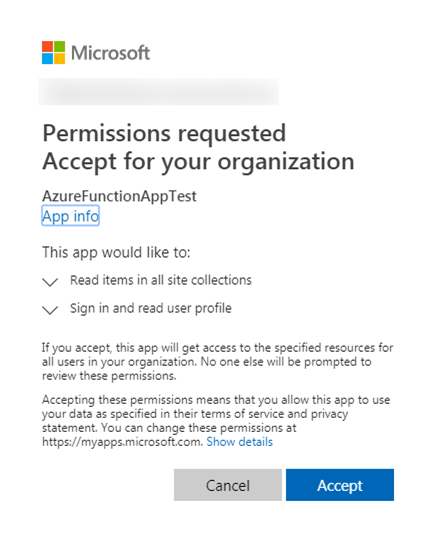
There are two things of which you need to be aware when accepting (or granting) application permission requests. First, consent can only be given by a tenant administrator and second, the administrator consents for all users in the tenant.
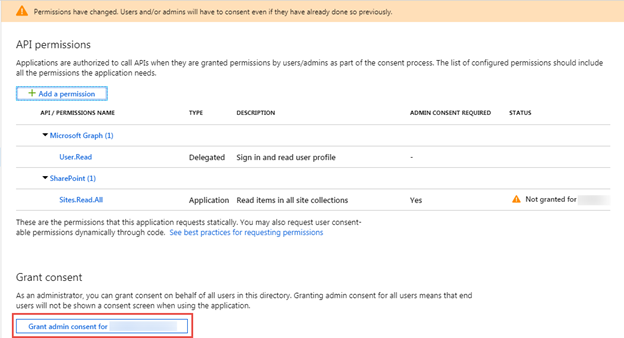
I could go on and on about both requesting and consenting permissions but that isn’t the focus of this blog post series so I’ll end that part of the discussion with a little shortcut you can use to consent permissions. In the API permissions page, there is a button use to grant the permission requests instead of having to navigate to the consent page.
That completes this part of the series. The next post will cover how to create an Azure Function App project in Visual Studio and how to develop Azure Functions that communicate with SharePoint using CSOM. That post will be coming soon.