
“In old-school SharePoint, if you wanted to run some custom code in a web part, workflow, form, or event handler, you wrote either a sandboxed or a farm solution. Neither of these are supported in SharePoint Online. So what are developers supposed to do when they need to run some code somewhere other than the web browser? How can they run code in the background, elevate permissions, or fill gaps in the “out of the box” configuration options?”
That paragraph opens a blog post series by Bob German entitled Calling SharePoint CSOM from Azure Functions.
Following the walkthrough contained in Bob’s posts is how I got started developing Azure Functions that interacted with SharePoint. However, there have been some changes since June 2017 when Bob’s posts were first published. The three major changes are: the ability to develop Azure Functions using Visual Studio, the switch to the new version of app registrations in the Azure portal, and the associated switch from using the Azure Active Directory Authentication Libraries (ADAL) to using the Microsoft Authentication Library (MSAL) to authenticate with Azure AD. In this blog post series I’ll provide an updated version of Bob’s walkthrough, one that uses the current technologies and tooling.
This series will show you how use Visual Studio to develop and deploy an Azure Function that calls SharePoint’s Client-Side Object Model (CSOM).
Part 1 – Registering an application with Azure Active Directory
Part 2 – Developing Azure Functions in Visual Studio (This Post)
Part 3 – Creating an Deploying an Azure Function App
Developing Azure Functions in Visual Studio
Azure Functions Tooling
You can develop Azure Functions in Visual Studio 2017 and Visual Studio 2019. In both cases you will need to make sure you’ve included the Azure development workload.

In Visual Studio 2017, the Azure development workload installs the Azure Functions Tools as a separate extension. If you are using Visual Studio 2017, you need to install those as well.
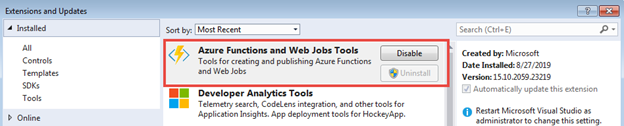
For more information on the Azure Functions tooling for Visual Studio 2017, please visit Develop Azure Functions using Visual Studio.
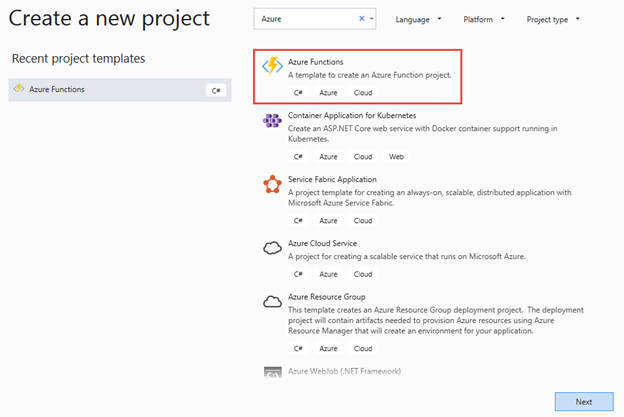
Creating the Azure Functions project
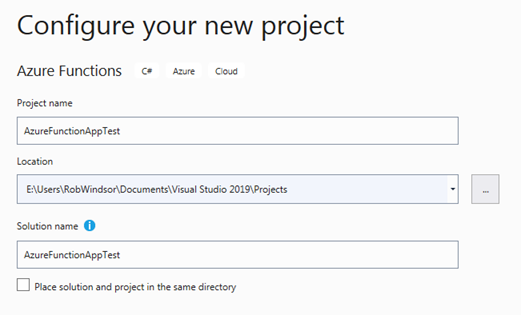
Create a new Azure Functions project and name it AzureFunctionAppTest. If you are using Visual Studio 2017 you will find the project template under the Cloud node in the left-hand navigation.
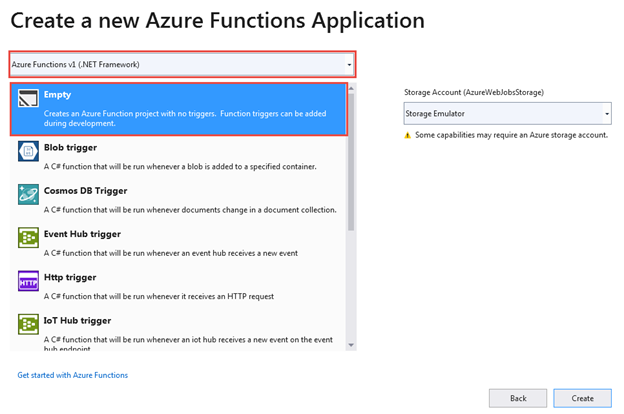
You will be presented with a dialog that has a dropdown you can use to select which Azure Functions runtime version you wish to use and whether you want to create an initial function in your project.
There are three major versions of the Azure Functions runtime: versions 1, 2 and 3. The version 1 runtime runs on the .NET Framework 4.6, version 2 of the runtime runs on .NET Core 2.2, and version 3 of the runtime (which is in preview) runs on .NET Core 3.x. At the time of writing of this blog post you are forced to choose the version 1 runtime since the SharePoint Client Object Model library does not currently run on .NET Core.
If you choose to create an initial function here, you are not given the opportunity to name it so choose Empty to create a project without an initial function.
Add an Azure Function
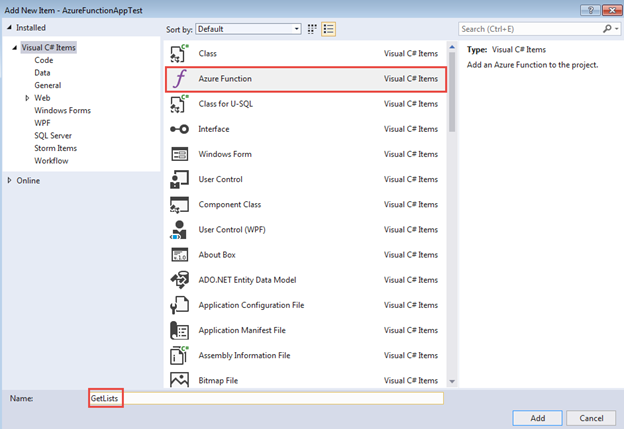
Right-click the project in the Solution Explorer and select Add > New Azure Function.... Select the Azure Function item template, name the class GetLists, and select Add.
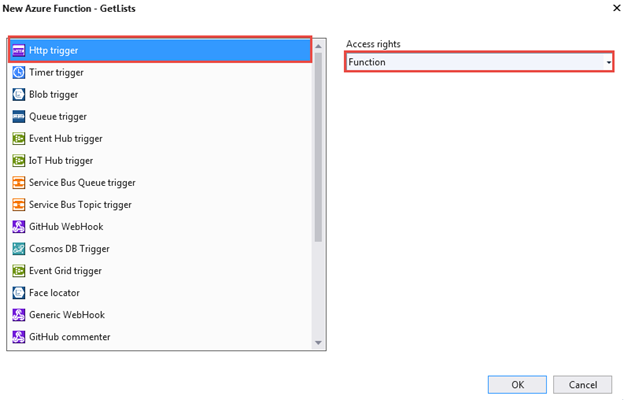
You have several options as to how the function will be triggered. It could be triggered from an HTTP request, from an item being added to an Azure Storage queue, from a WebHook firing, and so on. In this example the function will be triggered by an HTTP request. I’ll cover the Access rights setting in the next blog post.
The function that is generated receives an HttpRequestMessage and a TraceWriter as parameters and returns an HttpResponseMessage. Notice that the attribute that decorates the HttpRequestMessage parameter indicates that it will accept GET and POST requests. You can use the HttpRequestMessage parameter to get information about the request that triggered the function and you can use the TraceWriter for logging.
The body of the function checks the query string and the message body for a parameter named name. If it finds the name parameter, it returns a success response with the text “Hello “ plus the value of the name parameter in the body. If it does not find the name parameter, it returns an error response with the text "Please pass a name on the query string or in the request body" as the error message.
[FunctionName("GetLists")]
public static async Task<HttpResponseMessage> Run(
    [HttpTrigger(AuthorizationLevel.Function, "get", "post", Route = null)]
    HttpRequestMessage req, TraceWriter log)
{
    log.Info("C# HTTP trigger function processed a request.");

    // parse query parameter
    string name = req.GetQueryNameValuePairs()
        .FirstOrDefault(q => string.Compare(q.Key, "name", true) == 0)
        .Value;

    if (name == null)
    {
        // Get request body
        dynamic data = await req.Content.ReadAsAsync<object>();
        name = data?.name;
    }

    return name == null
        ? req.CreateResponse(HttpStatusCode.BadRequest,
            "Please pass a name on the query string or in the request body")
        : req.CreateResponse(HttpStatusCode.OK, "Hello " + name);
}
Test the Azure Function
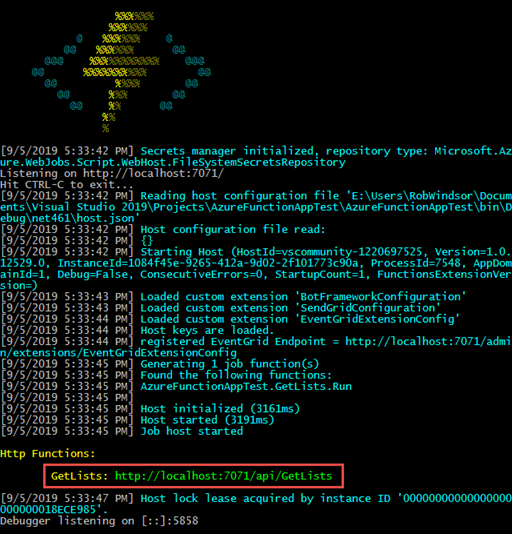
To test your function, press F5 or select Debug > Start Debugging from the main menu. Doing so will open a window that will host your function and show information about requests and responses.
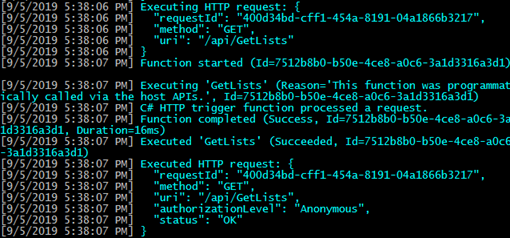
There are several tools you can use to send a request to a function, I’ll be using Fiddler Composer. Start by making a request to the function that does not include the name parameter on the query string.

As expected, the function will return an error response with the error message noted above.


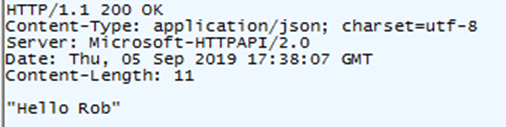
Now make a request that includes the name parameter on the query string. You can do this by setting the URL of the request to http://localhost:7071/api/GetLists?name=Rob. This time you should receive a success response with “Hello Rob” in the body.
It’s now time to add the real implementation of the function. Delete all of the generated code except the first line that logs that the function has been invoked.
Implementing the GetLists function
As I mentioned in Part 1 of the series, the GetLists function will use the SharePoint Client Object Model to get the names of all non-hidden lists in a SharePoint Online site. The function will know which site to query by looking at a parameter named siteUrl which will be included on the query string or in the body of the request.
Since the function is running external to SharePoint, you will need to authenticate with Azure AD and get an access token which you will include with the CSOM calls. SharePoint will use the access token to validate the identity used to get the token and determine if it has the necessary rights to retrieve information about the lists.
Authenticating with Azure AD and getting an access token
In Part 1 of the series you setup an Azure AD application and granted it permission to read information from all of the SharePoint sites in your tenant. The credentials for this application are an Application ID (which is effectively the user name) and a certificate (whose private key is effectively the password for the application).
To authenticate with Azure AD, the function will need the value of the Application ID and an X509Certificate2 object it can get from reading the PFX file exported from the certificate.
Add a using statement for the namespace that contains the X509Certificate2 class.
using System.Security.Cryptography.X509Certificates;
The add the following code to read the PFX file exported from the certificate. Make sure to change the value of the certPassword variable if you used a different password to secure the PFX file than I did and make sure to change the certPath variable to the full path to the PFX file on your machine. You are testing your function locally to start so it is OK to use a local path to the PFX file. You will update this code to set the path for the Azure hosted function in Part 3 of the series.
var certName = "AzureFunctionAppTest.pfx";
var certPassword = "pass@word1";
var certPath = @"C:\Users\RobWindsor\Documents\Certs\" + certName;
var cert = new X509Certificate2(
    System.IO.File.ReadAllBytes(certPath),
    certPassword,
    X509KeyStorageFlags.Exportable |
    X509KeyStorageFlags.MachineKeySet |
    X509KeyStorageFlags.PersistKeySet);
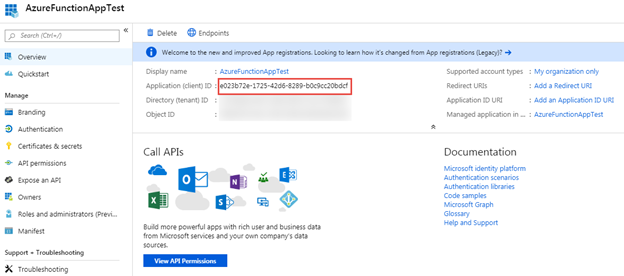
In the next step you’ll need the Application ID for the Azure AD application. You can get it from the Overview page for the application in the Azure Portal.
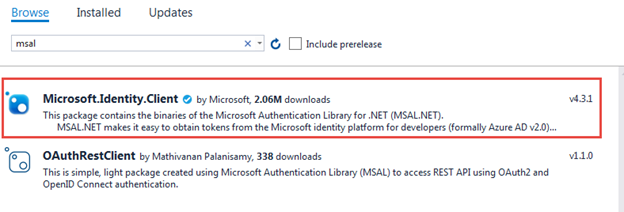
You will use the Microsoft Authentication Library (MSAL) for .NET to authenticate with Azure AD and the get an access token. Right-click on the project in the Solution Explorer and select Manage NuGet Packages.... Search for msal, select the Microsoft.Identity.Client package, and select Install.
Once the package has been installed, add a using statement for Microsoft.Identity.Client.
using Microsoft.Identity.Client;
Add the following code to authenticate with Azure AD and get an access token. Make sure to replace the value of the tenantName variable with the name of your tenant and replace the value of the clientId variable with the Application ID you got from the Overview page for the application in the Azure Portal.
This code starts by using the ConfidentialClientApplicationBuilder type to create an object that implements the IConfidentialClientApplication interface. Note that we give the builder both the Application ID (clientId variable) and the X509Certificate2 (cert variable). These values are used to authenticate with Azure AD.
The code then uses the IConfidentialClientApplication.AcquireTokenForClient method to get an access token. This method takes the scopes variable, which represents the permission scopes being requested, as a parameter. The part of the value of the scopes variable that looks like a domain name indicates that permissions are being requested for SharePoint Online. The /.default part indicates that the permission scopes being requested are those configured for the application in the Azure Portal. Recall that you requested the Sites.Read.All permission scope in Part 1 of this series.
var tenantName = "robwindsor2";
var clientId = "e023b72e-1725-42d6-8289-b0c9cc20bdcf";
var authority =
    $"https://login.microsoftonline.com/{tenantName}.onmicrosoft.com/";
var azureApp = ConfidentialClientApplicationBuilder.Create(clientId)
    .WithAuthority(authority)
    .WithCertificate(cert)
    .Build();

var scopes = new string[] {
    $"https://{tenantName}.sharepoint.com/.default" };
var authResult = await azureApp.AcquireTokenForClient(scopes).ExecuteAsync();
var token = authResult.AccessToken;

return req.CreateResponse(HttpStatusCode.OK, "Token: " + token);
Start a debug session for your function and then make a request to it. You should get a success response that includes the access token in the body.

After you complete your test, comment out the line of code that returns a success response that includes the access token (i.e. the last line of code in the above snippet).
Reading the site URL from the query string of request body
Before you add the Client Object Model code, you need ensure the site URL has been passed with the request. Add the following code to the top of the function just after the line that logs that the function has been invoked. The code will first check for the site URL in the query string and then, if the value was not found, check for it in the body of the request. If the site URL was not found in either place then it will return an error response with an appropriate message.
var siteUrl = req.GetQueryNameValuePairs()
    .FirstOrDefault(q => string.Compare(q.Key, "siteUrl", true) == 0)
    .Value;

if (siteUrl == null)
{
    dynamic data = await req.Content.ReadAsAsync<object>();
    siteUrl = data?.name;
}

if (siteUrl == null)
{
    return req.CreateResponse(HttpStatusCode.BadRequest,
        "Please pass a site URL on the query string or in the request body");
}
Interacting with SharePoint using the Client Object Model (CSOM)
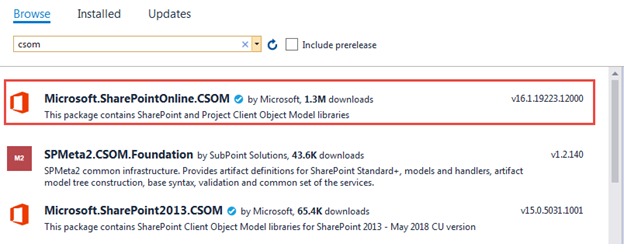
You are now ready to add the Client Object Model code. Right-click on the project in the Solution Explorer and select Manage NuGet Packages.... Search for csom, select the Microsoft.SharePointOnline.CSOM package, and select Install.
Add the following using statements. The top one is for the namespace containing the types in the Client Object Model.
using Microsoft.SharePoint.Client;
using System.Collections.Generic;
using Newtonsoft.Json;
using System.Text;
Add the following code to find and return the names for all of the non-hidden lists in the site identified in the request. This code uses the ClientContext.ExecutingWebRequest event handler to ensure that the access token received from Azure AD is included in the headers of every request to SharePoint. The code also uses the Newtonsoft.Json library to format the response content as a JSON array.
var listNames = new List();
using (var context = new ClientContext(
    $"https://{tenantName}.sharepoint.com" + siteUrl))
{
    context.ExecutingWebRequest += (s, e) =>
    {
        e.WebRequestExecutor.RequestHeaders["Authorization"] =
            "Bearer " + token;
    };

    var query = context.Web.Lists.Where(l => l.Hidden == false)
        .OrderBy(l => l.Title);

    var lists = context.LoadQuery(query);
    context.ExecuteQuery();

    foreach (var list in lists)
    {
        listNames.Add(list.Title);
    }
}

var responseContent = JsonConvert.SerializeObject(
    listNames, Formatting.Indented);
var response = new HttpResponseMessage(HttpStatusCode.OK)
{
    Content = new StringContent(responseContent, Encoding.UTF8,
        "application/json")
};
return response;
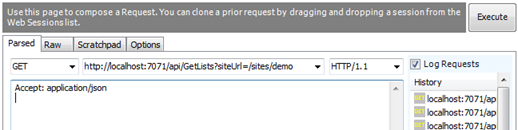
Start a debug session for your function and then make a request to it that includes a siteUrl parameter on the query string. The value of the siteUrl parameter should be the server-relative URL to a site in your tenant. I used /sites/demo when I tested my function.
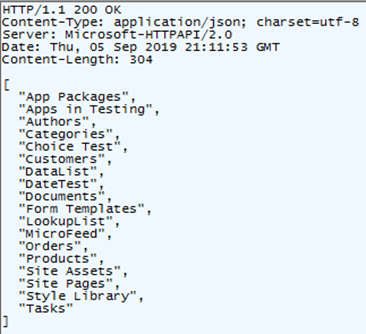
You should get a success response that includes the names of the non-hidden lists as a JSON array in the body.
That completes this part of the series. The complete code for the Azure function is shown below. Please note that the code has been re-formatted slightly to fit the screen.
The next post will cover how to deploy your Azure function to an Azure Functions App which you will create using the Azure Portal.
using System.Linq;
using System.Net;
using System.Net.Http;
using System.Threading.Tasks;
using Microsoft.Azure.WebJobs;
using Microsoft.Azure.WebJobs.Extensions.Http;
using Microsoft.Azure.WebJobs.Host;
using System.Security.Cryptography.X509Certificates;
using Microsoft.Identity.Client;
using System.Collections.Generic;
using Microsoft.SharePoint.Client;
using Newtonsoft.Json;
using System.Text;

namespace AzureFunctionAppTest
{
    public static class GetLists
    {
        [FunctionName("GetLists")]
        public static async Task<HttpResponseMessage> Run(
            [HttpTrigger(AuthorizationLevel.Function,
            "get", "post", Route = null)]
        HttpRequestMessage req, TraceWriter log)
        {
            log.Info("C# HTTP trigger function processed a request.");

            var siteUrl = req.GetQueryNameValuePairs()
                .FirstOrDefault(q =>
                    string.Compare(q.Key, "siteUrl", true) == 0)
                .Value;

            if (siteUrl == null)
            {
                dynamic data = await req.Content.ReadAsAsync<object>();
                siteUrl = data?.name;
            }

            if (siteUrl == null)
            {
                return req.CreateResponse(HttpStatusCode.BadRequest,
                    "Please pass a site URL on the query string " +
                    "or in the request body");
            }

            var certName = "AzureFunctionAppTest.pfx";
            var certPassword = "pass@word1";
            var certPath = @"C:\Users\RobWindsor\Documents\Certs\"
                + certName;
            var cert = new X509Certificate2(
                System.IO.File.ReadAllBytes(certPath),
                certPassword,
                X509KeyStorageFlags.Exportable |
                X509KeyStorageFlags.MachineKeySet |
                X509KeyStorageFlags.PersistKeySet);

            var tenantName = "robwindsor2";
            var clientId = "e023b72e-1725-42d6-8289-b0c9cc20bdcf";
            var authority =
                "https://login.microsoftonline.com/" +
                $"{tenantName}.onmicrosoft.com/";
            var azureApp =
                ConfidentialClientApplicationBuilder.Create(clientId)
                    .WithAuthority(authority)
                    .WithCertificate(cert)
                    .Build();

            var scopes = new string[] {
                $"https://{tenantName}.sharepoint.com/.default" };
            var authResult = await
                azureApp.AcquireTokenForClient(scopes).ExecuteAsync();
            var token = authResult.AccessToken;

            // return req.CreateResponse(HttpStatusCode.OK,
            //    "Token: " + token);

            var listNames = new List<string>();
            using (var context = new ClientContext(
                $"https://{tenantName}.sharepoint.com" + siteUrl))
            {
                context.ExecutingWebRequest += (s, e) =>
                {
                    e.WebRequestExecutor.RequestHeaders["Authorization"] =
                        "Bearer " + token;
                };

                var query = context.Web.Lists.Where(l => l.Hidden == false)
                    .OrderBy(l => l.Title);

                var lists = context.LoadQuery(query);
                context.ExecuteQuery();

                foreach (var list in lists)
                {
                    listNames.Add(list.Title);
                }
            }

            var responseContent = JsonConvert.SerializeObject(
                listNames, Formatting.Indented);
            var response = new HttpResponseMessage(HttpStatusCode.OK)
            {
                Content = new StringContent(responseContent, Encoding.UTF8,
                    "application/json")
            };
            return response;
        }
    }
}