
We all want to know where our data is and who can see it, and most importantly we want to know without a doubt that people who shouldn’t see it can’t.
Retention Labels. Sensitive Information Types. Unified Labeling. Information Protection. Data Loss Prevention. Security Policies. Microsoft sure does provide a lot of ways to keep your data safe, and they all have unique uses. Recently, Microsoft launched a new label and policy pairing, named simply “Sensitivity.” But with similar tools already in place, where does this fit in?
Sensitivity Labels and Sensitivity Policies allow users to classify documents, files, and emails so that the data is protected no matter what device, app, or service it’s accessed from. Work issued laptop? Covered. Personal mobile device? You bet. SharePoint Online? No worries. Outlook? Like you have to ask. Even third-party apps like DropBox? You guessed it, protected.
Sensitivity Labels can help you encrypt your data, label it with watermarks or other visual protections, and even track activity data on your sensitive content. They’re completely customizable, and there’s a LOT of choices, so how do you get started?
Let’s look at a common concern in today’s Cloud computing world.
Most companies have a specific type of document that is unique to them that might not be covered by existing Sensitive Information Types. It might not contain something so obvious as a Social Security Number or a Driver’s License number, but your employees know it when they see it, and they know it could damage the company if the information were compromised. For our purposes, we’re going to call this Commercially Protected data.
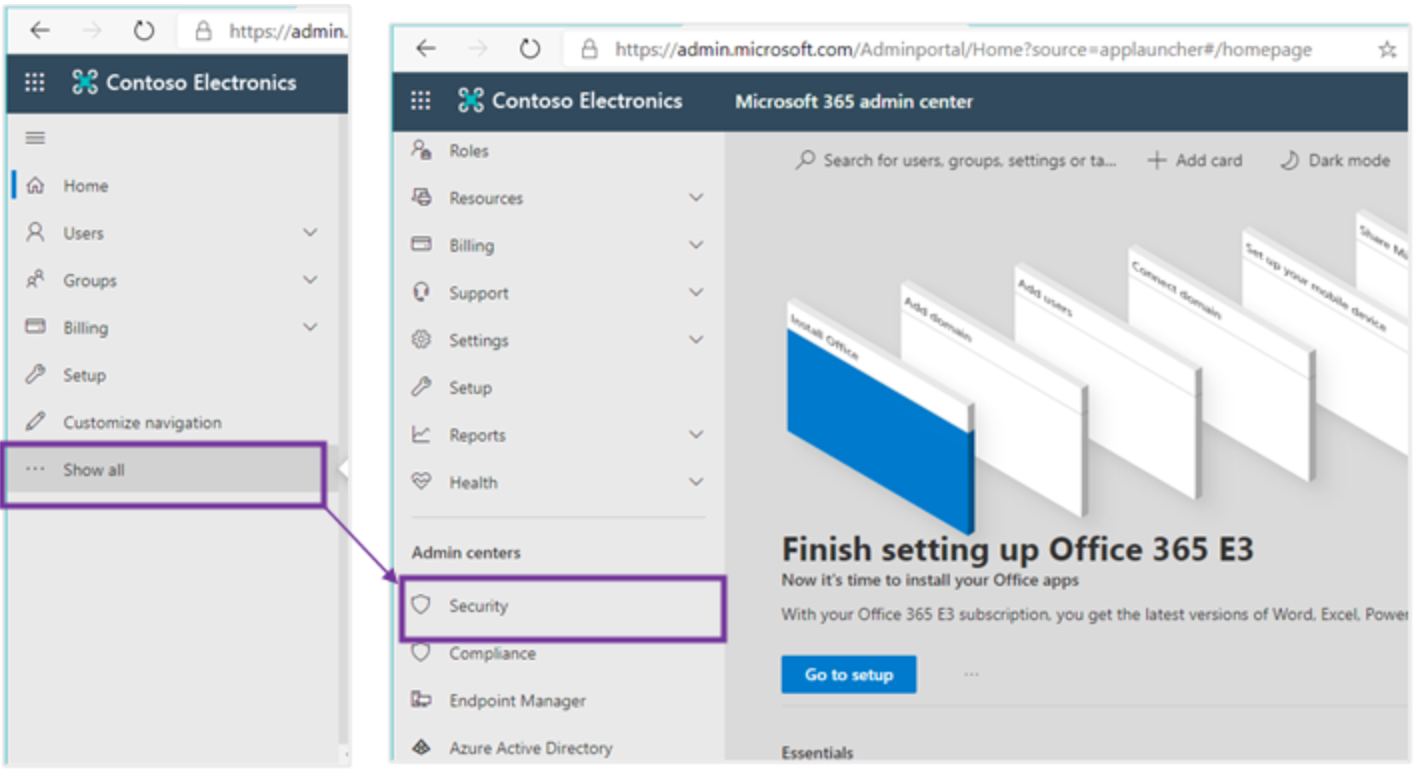
Step 1: Log in to the Security and Compliance Admin Center and go to Security.
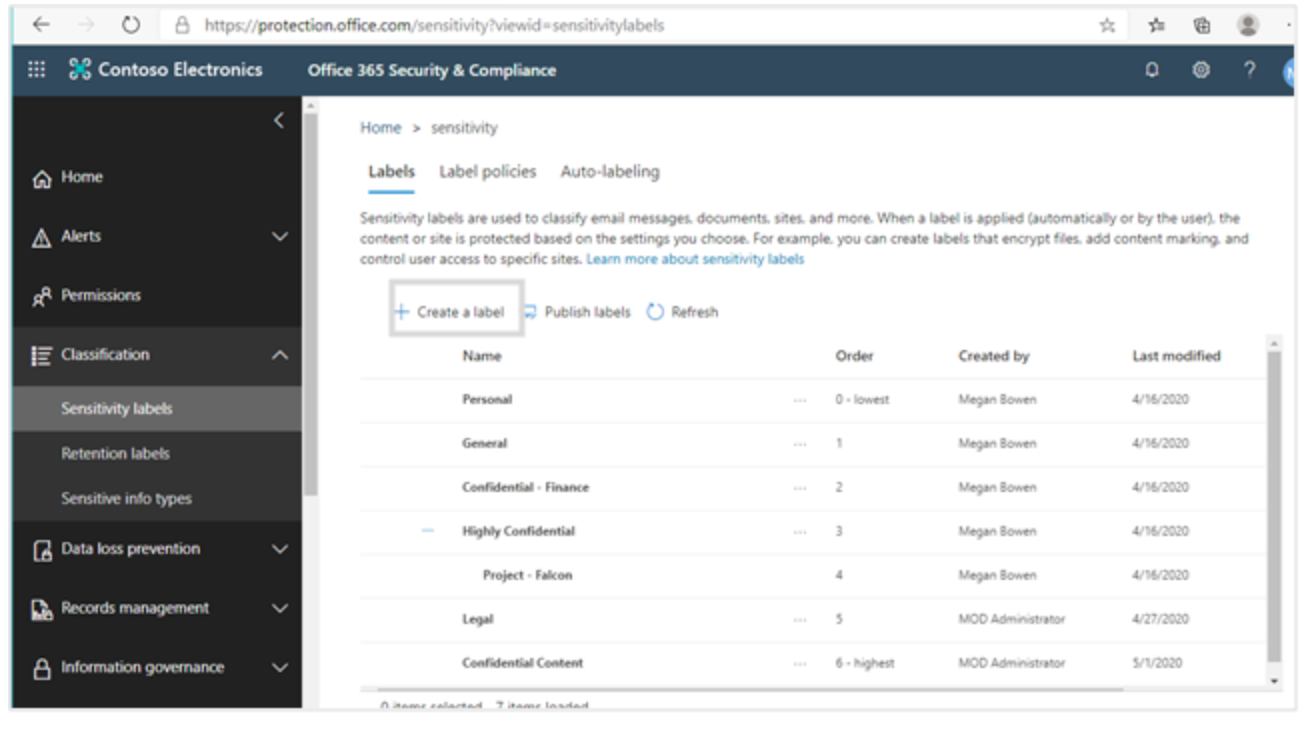
Step 2: Classification> Sensitivity Labels
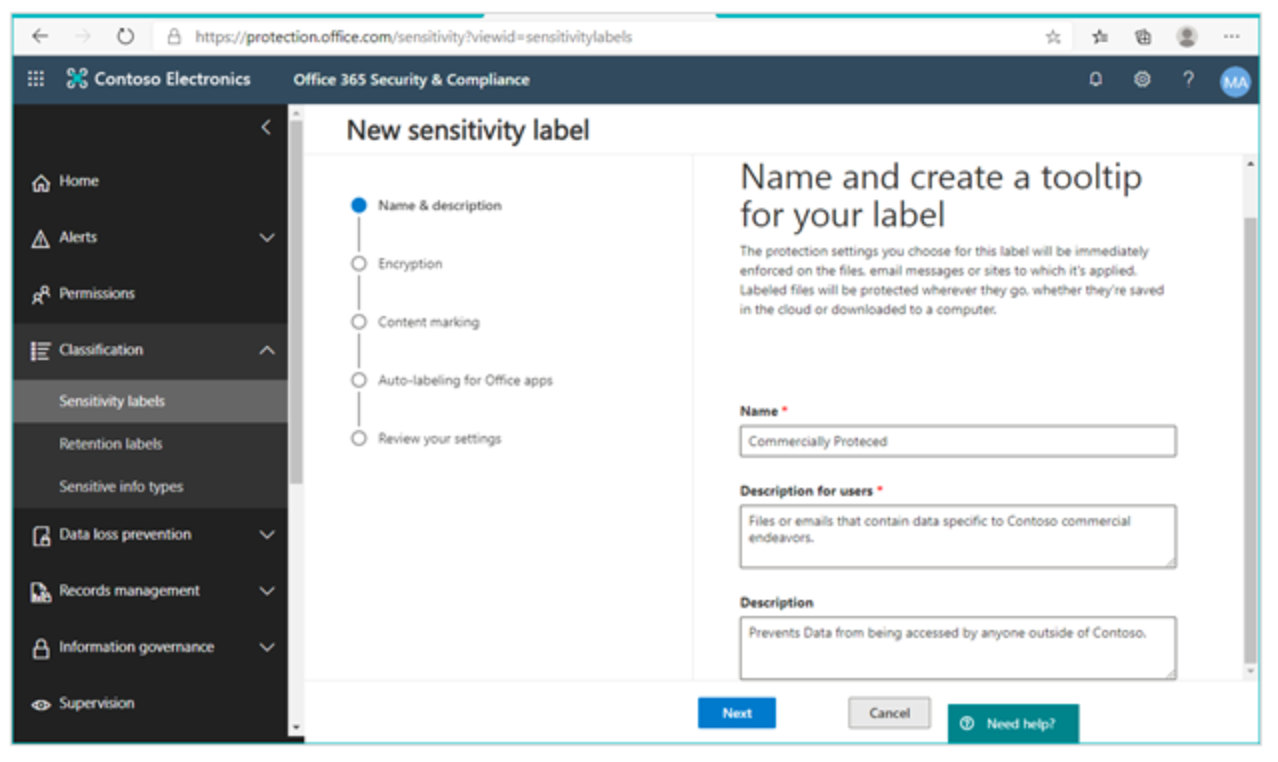
Step 3: Create a new Label (Name and create a description)
Step 4: Encrypt data
Step 5: Assign Permissions
Step 6: Marking your content
Step 7: Applying Conditions to the Label
Step 8: Review and Publish
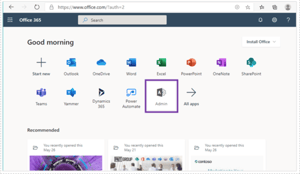
To create this Sensitivity label, log in to the Security and Compliance Admin Center. I like to get there by going to Office.com, selecting Admin, and then Security from the “Show All” menu. There are other ways to get to the Sensitivity Labels, but this is the clearest to me.
From here we go to Classification> Sensitivity Labels

Create a New Label.
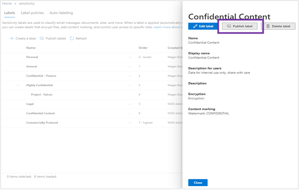
Provide a name, a description for users, and a description for the administrative team that manages labels if desired.
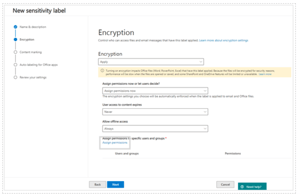
We want to Encrypt data using this label, specifically we want to make sure that only users within our company can view these files, documents, or emails. We will enable encryption and assign permissions now. We don’t want this access to expire, and we do want to allow offline access.
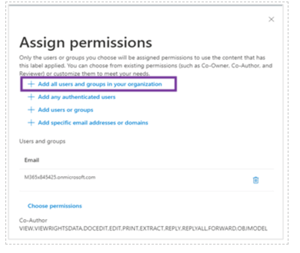
Next, we want to assign the permissions. At this point we could select we want this data to be read only to all users, or certain users can co-author, but others can’t see it at all. You have a lot of flexibility. For this example, we want all Contoso employees to have coauthoring permissions. Click Assign permissions, then “Add all users and groups in your organization” and then save.
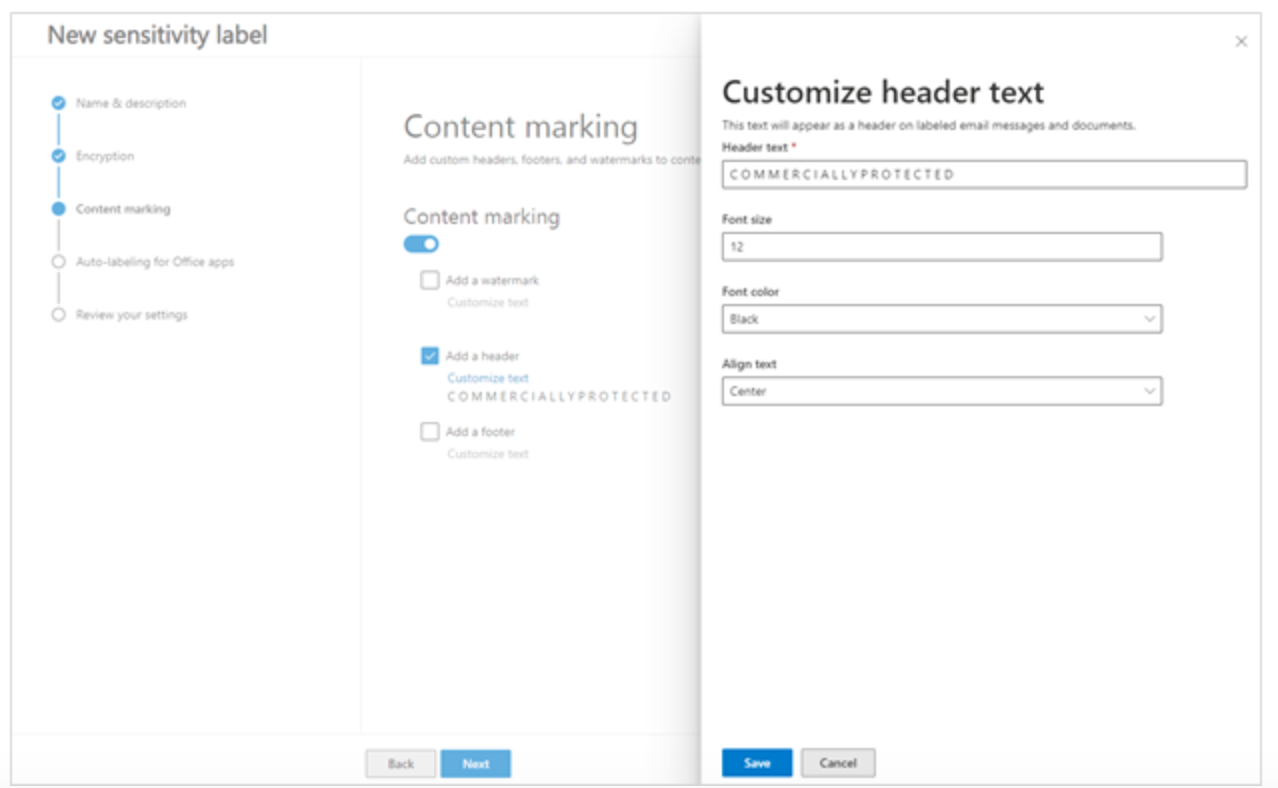
Next you can choose whether to mark your content. You can add a watermark, custom headers, or custom footers. We added a header identifying this data as “Commercially Protected.”
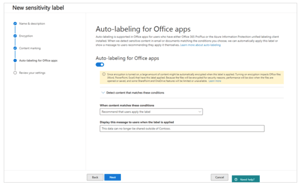 Now we select when we want this label to be applied. You can either set up conditions where this label will get applied automatically, or you can recommend that users apply it when those conditions are met. In our case, we don’t have a set condition, so we will not enable Auto-labeling. Users will be responsible for identifying when data is Commercially Protected or not.
 Review your Sensitivity Label settings, and then create your label.
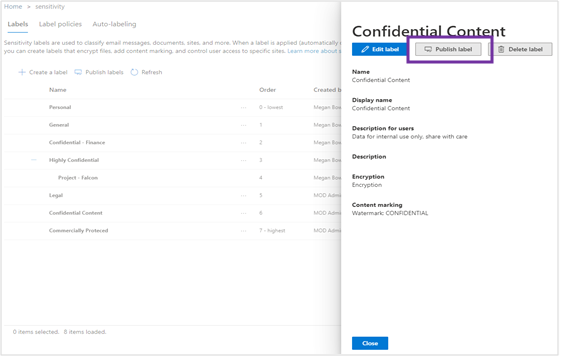
 Now you must publish the label. From the list of existing labels, select your new one, then Publish Label.
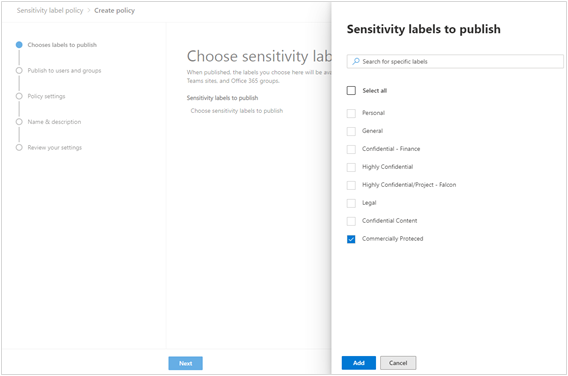
From the “Choose labels” section, click Choose sensitivity labels to publish. Select your new label, then add.
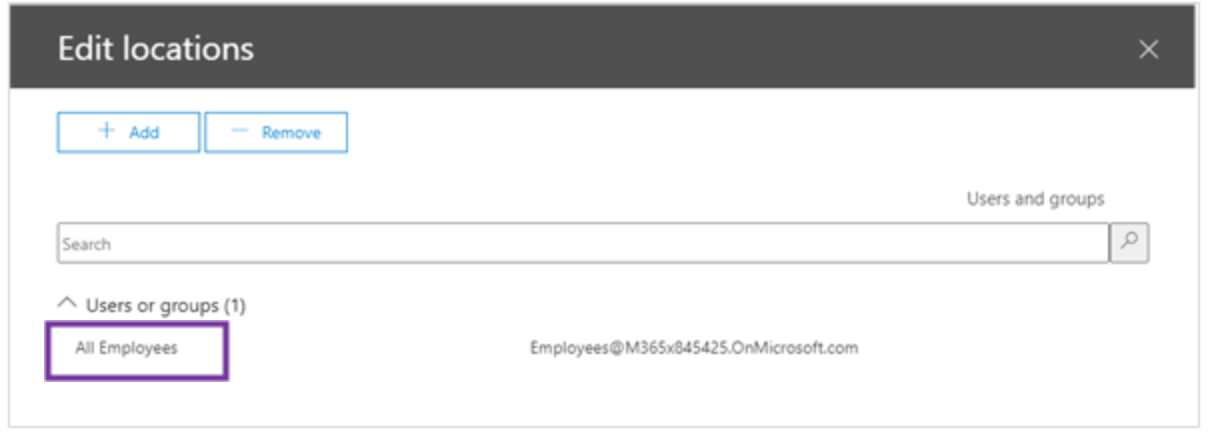
Select users to publish this label to, in this case “All Employees” again.
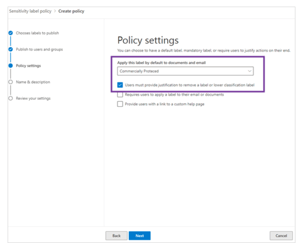 Then we select if we want to apply this label by default or rely on users to add it. Then you can create a prompt to require users to justify why they might remove the label. For this example we are going to automatically apply the Commercially Protected label to documents and email, but let users remove it if they don’t believe the data qualifies. In short, we are setting up a policy that will ensure ALL documents in our environment are internal by default.
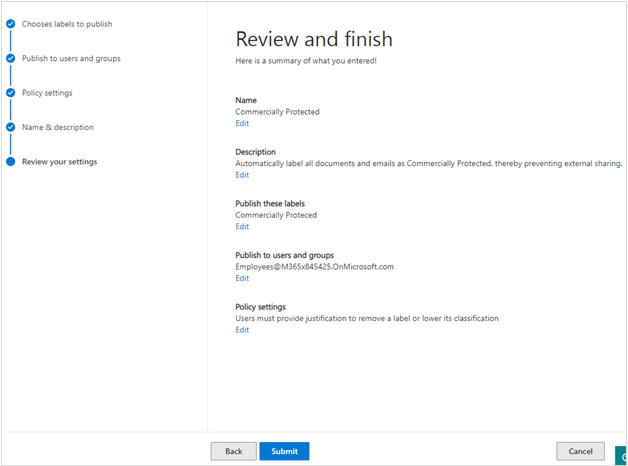
Now we name the policy, Review the settings, and Publish it.
 It may take up to 48 hours for a new policy to deploy to your environment. Once deployed, you can apply your new label from within Office apps, such as Word, Excel, PowerPoint and even Outlook.
For information from Microsoft on Sensitivity Labels: https://support.microsoft.com/en-us/office/create-and-manage-sensitivity-labels-2fb96b54-7dd2-4f0c-ac8d-170790d4b8b9