
Modern SharePoint pages make adding images about as easy as it could be. You can drag and drop an image from your desktop right onto a SharePoint page. You can add an Image web part and browse your site for an existing image. Haven’t uploaded the image yet? You can do that too from the image picker. What’s more, there is a robust stock image library that Microsoft has provided. Still can’t find what you’re after? Do a web search and use an image from a website (only licensed images, of course!).
That’s all hugely improved over earlier version of SharePoint and makes constructing great-looking pages easy. But what about a scenario where your organization’s marketing and communications department already has a big library of approved company images – like variations of the logo, specific graphics for websites, or your own company stock images that should be used whenever possible to maintain the company’s brand throughout the intranet? While many organizations have this content available, it’s often not stored in a place that’s convenient to access, especially when you’re trying to build out a SharePoint page quickly and need to add the company-approved images.
Fortunately, Microsoft has solved this problem by allowing us to set up an Organization Asset Library. This is a document library (or several libraries) in SharePoint that have been designated as official repositories of company content. The most common use for this is for company images or logos, but you could also provide other content here as well, such as letterhead templates and other content that you’d want to have accessible to everyone in the company. When this is set up, a new tab appears in the image picker, allowing you to open the library no matter what site you’re working on!
This centralized approach to storing company assets is a huge help in maintaining branding consistency on the intranet while still allowing content owners to build their own pages. Often, organizations will set up the Org Asset Library within the Marketing or Communications department’s site so they can control what content is available to the rest of the company.
Setting up the Organization Asset Library requires a couple of steps in PowerShell, so you’ll have to have at least a SharePoint Admin role in your organization. It’s not enough to be an administrator on a single site; you need to be granted the SharePoint Administrator role in the Microsoft 365 admin center. If you don’t have this role, you’ll need to talk to your M365 admin and nicely ask if they could set this up for you.
The main decision you need to make is which library will be designated as the Organization Asset Library. Remember that you can have multiple Org Asset Libraries. This could be useful if multiple groups want to make their content available to the rest of the company). From there, you’ll just need to run a bit of PowerShell, and your library is configured!
Here’s how to set up the Organization Asset Library:
- Decide which library will be designated as the Organization Asset Library
- The library should ideally be in a location that all users have read access to.
- You’ll also want to make sure the proper group or department have edit access on the site to upload approved content to the library.
- Launch the SharePoint Online Management Shell (or your PowerShell terminal with the SharePoint Online modules installed).
- In PowerShell, connect to your site by running the command:
Connect-SPOService -url "https://yourtenant-admin.sharepoint.com"- Replace “yourtenant” with the actual URL of your tenant.
- You’ll be prompted to log in, so log in with an account that has at least the SharePoint Admin role
- If you’d like, you can verify your connection by running the command Get-SPOSite which will show you a list of all sites in your tenant.
- Next, you’ll run the cmdlet Add-SPOOrgAssetsLibrary. This cmdlet is what sets the library as an Organization Asset library. It needs a few bits of information to properly configure the library, like the URL of the library, a thumbnail URL for the folder background, the type of asset library you want to create, and the CDN type that you want to use. Here’s an example:
Add-SPOOrgAssetsLibrary -LibraryUrl "https://yourtenant.sharepoint.com/sites/Marketing/CompanyPhotos" -ThumbnailUrl "https://yourtenant.sharepoint.com/siteassets/myphoto.jpg” -OrgAssetType ImageDocumentLibrary -CdnType Private- The –LibraryUrl parameter is straightforward: just provide the URL of the library you plan to use as the org asset library.
- The –ThumbnailURL parameter is optional. But you can provide the URL of an image you’d like to use as the thumbnail on the asset folder.
- The –OrgAssetType parameter lets you specify the type of asset library you are creating: This example sets the library to use images. You can change the type to OfficeTemplateLibrary to store Word, PowerPoint, and other Office document templates. The Office templates will be available in the respective Office applications. If you want to use both images and templates in the same library, you can set the parameter to ImageDocumentLibrary,OfficeTemplateLibrary to take advantage of both. (I would recommend keeping them separate for ease of management, however)
- Finally, the –CDNType parameter can be set to Private or Public. A CDN (or Content Delivery Network) speeds up the delivery of files to the user’s browser by caching commonly accessed files in a network location closer to the user. In this example, the CDN type is set to private, so content stored is only accessible by users with permission. If you don’t specify the –CDNType parameter, it will default to Private. A Public CDN means that the URL of any content stored there is accessible without a secure login. For most use cases, a Private CDN is what you’ll want here.
-
When you run the command, you’ll be asked to confirm that you want to use this library as part of the CDN. Just type Y and press enter to confirm.
-
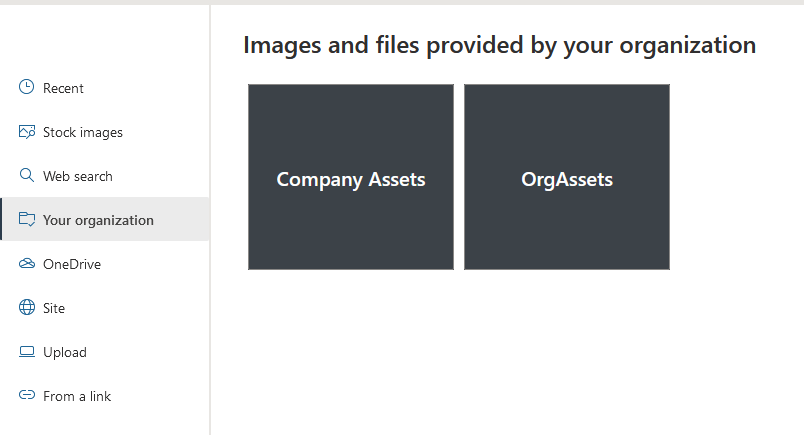
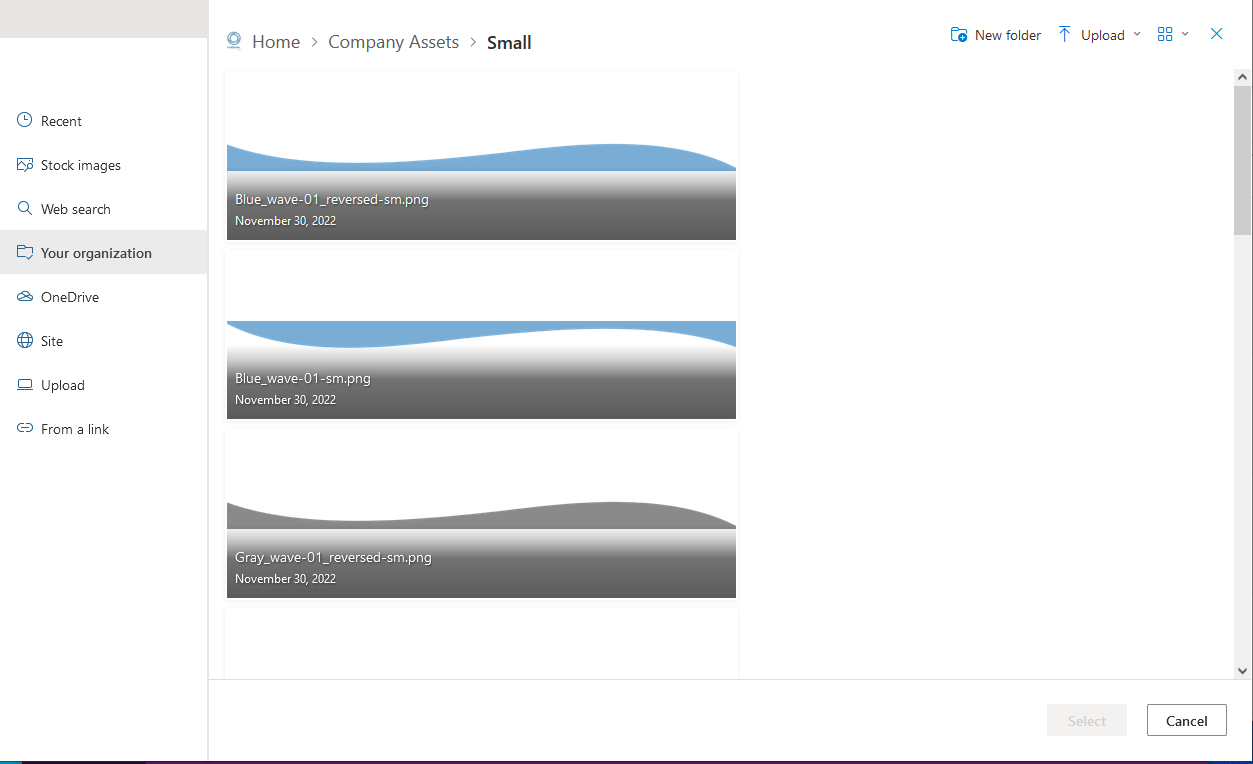
Once you’ve set your library as an Organizational Asset Library, it becomes available in the asset picker in SharePoint Online. Try it out! Just add an Image web part to the page and when you browse for the image, you’ll notice a new source in the left panel: “Your Organization.” Click on this to see the new asset library you’ve set. Additional Asset Libraries will also appear here as well if you configure more than one Organizational Asset Library.
A couple of other notes to be aware of as you set up your Org Asset Libraries:
The built-in group “Everyone except external users” must have at least read-only access to the library you are setting as an Org Asset Library. Otherwise, the cmdlet will throw an error message when you try to run it. Fortunately, it tells you exactly what the problem is so you can fix it. If the “Everyone except external users” group already has read access to the full site, you won’t need to change anything on the library.
You can configure multiple Org Asset libraries, BUT they all need to be stored in the same site. You can’t have an Org Assets Library on the Marketing Site and another on the Communications site. They both need to live in the same location. You can change the permissions on the library so only a particular group can manage its contents (provided, of course, that Everyone except external users has read access as well!)
As always, Pait Group is happy to assist with this process – don't hesitate to give us a call or drop us a line at support@paitgroup.com. We’ve configured Organization Asset Libraries for many of our clients, and they all agree it is a powerful addition to their intranets to get approved imagery into the hands of the content owners to support the company brand.