
I love a good form, but I am not a fan of the default form on SharePoint online. It does the job, sure, but it leaves so much to be desired. Most of the time I customize it via Power Apps, but that requires licensing and some Power Platform experience, and time. Sometimes, I work with clients that just don’t have those things. Luckily for them, there is a pretty simple way to spruce up the default SharePoint form using some copy paste and find and replace magic.
Configure Layout
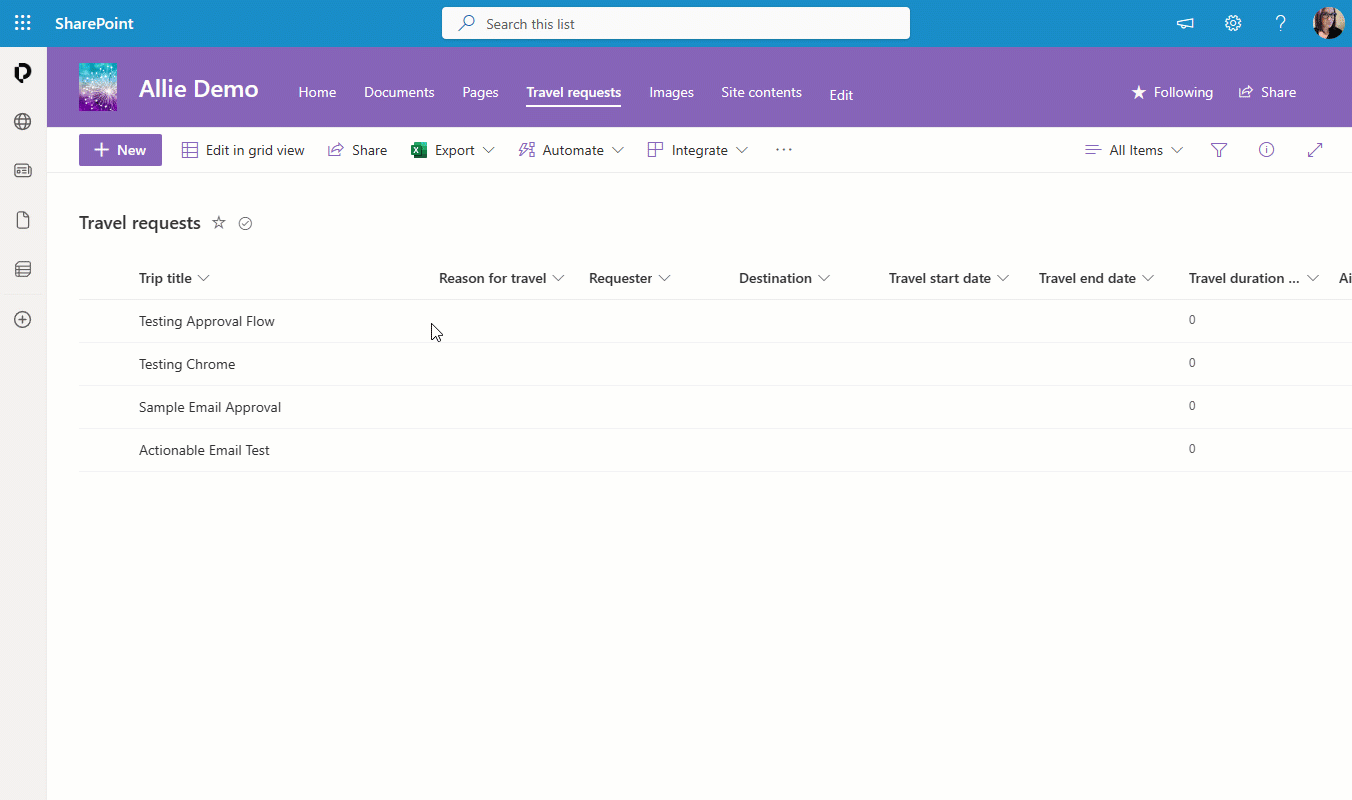
To start, you’ll want to have a list with some columns. For this demo, I’m using the template for a Travel Request, and the columns that came with that. Once you have your list, click on the “+ New” button to open the New Item form. Click on the Columns menu in the top right corner of the form, and then select “Configure Layout.”
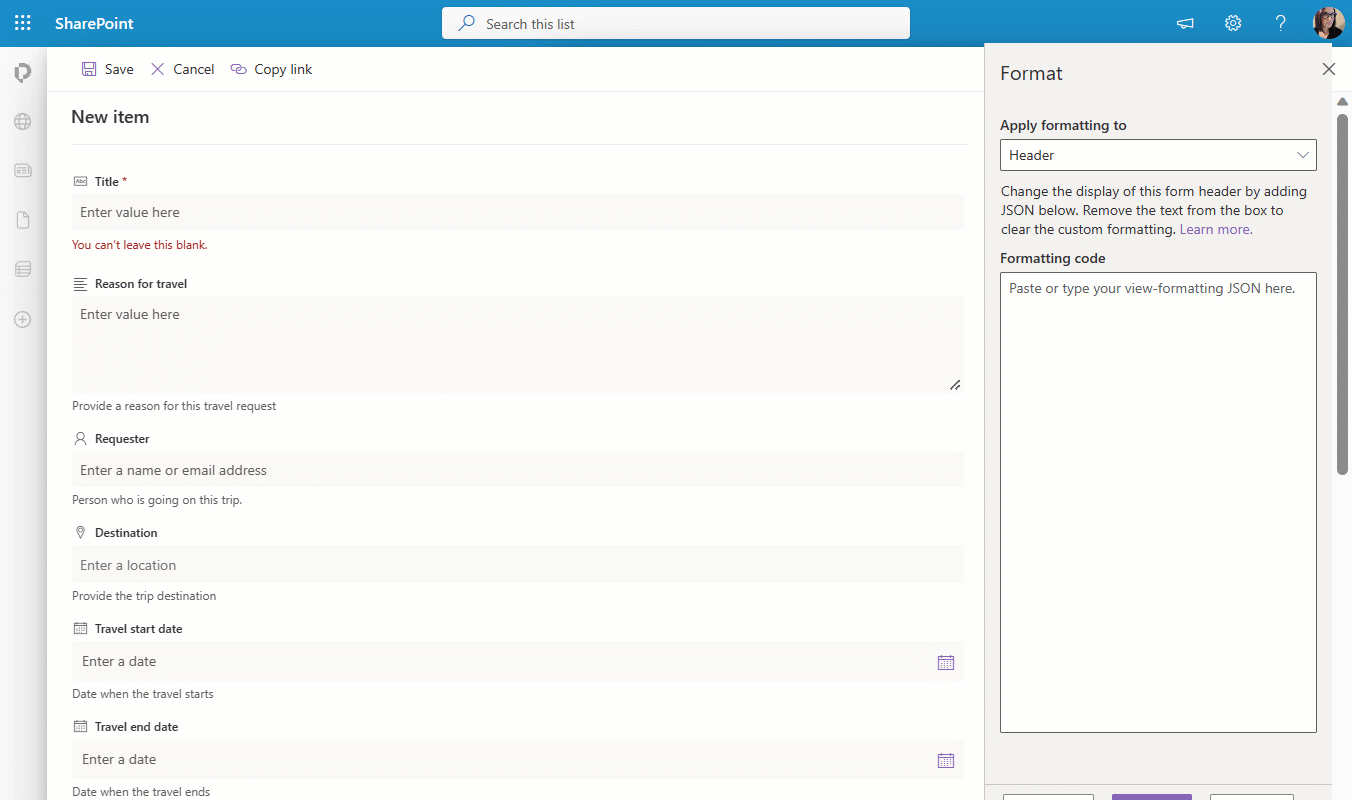
The layout of a form consists of three parts: a header, a body, and a footer. Each section can be formatted using JSON. Don’t let that scare you though! If you’re familiar with JSON, you can do a lot here but if you’re not comfortable writing or manipulating it, you can still use this feature with some minor tweaks.
Header
I’m going to start with the Header and put this JSON template. Paste this into the “Formatting Code” box.
| { "elmType": "div", "attributes": { "class": "ms-borderColor-neutralTertiary" }, "style": { "width": "99%", "border-top-width": "0px", "border-bottom-width": "1px", "border-left-width": "0px", "border-right-width": "0px", "border-style": "solid", "margin-bottom": "16px" }, "children": [ { "elmType": "div", "style": { "display": "flex", "box-sizing": "border-box", "align-items": "center" }, "children": [ { "elmType": "div", "attributes": { "iconName": "Group", "class": "ms-fontSize-42 ms-fontWeight-regular ms-fontColor-themePrimary", "title": "Details" }, "style": { "flex": "none", "padding": "0px", "padding-left": "0px", "height": "36px" } } ] }, { "elmType": "div", "attributes": { "class": "ms-fontColor-neutralSecondary ms-fontWeight-bold ms-fontSize-24" }, "style": { "box-sizing": "border-box", "width": "100%", "text-align": "left", "padding": "21px 12px", "overflow": "hidden" }, "children": [ { "elmType": "div", "txtContent": "='Details for ' + [$Title]" } ] } ] } |
You can click “Preview” or “Save” to see the changes. Now just remember if you’re formatting this layout from the New Item form, it will say “Details for” and then nothing, because there is nothing in the Title column yet. Don’t pull a “me” and sit here thinking it’s broken because it didn’t work. You can change the JSON here to update the style, like changing the colors or what the text will say. I’m going to update the font color of the header to the purple from my theme and update the icon. I will replace the following snippets:
| Original Code |
Replacement |
| "iconName": "Group", |
"iconName": "customlist", |
| "elmType": "div", "attributes": { "class": " ms-fontColor-neutralSecondary ms-fontWeight-bold ms-fontSize-24" }, |
"elmType": "div", "attributes": { "class": "ms-fontColor-themePrimary ms-fontWeight-bold ms-fontSize-24" }, |
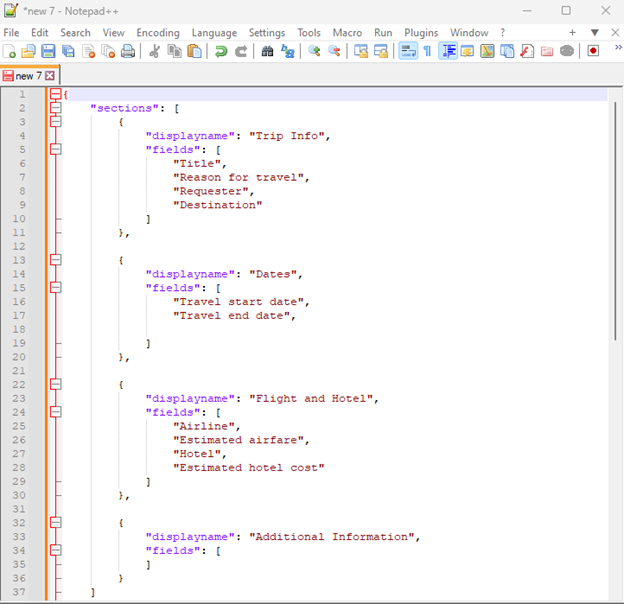
This part is often a lot of trial and error, figuring out which style block modifies which part of the header, but I know I can always return to the template to reset my changes. I usually put my JSON in a Notepad++ file and manipulate it there and then copy/paste it into SharePoint to see what happens.
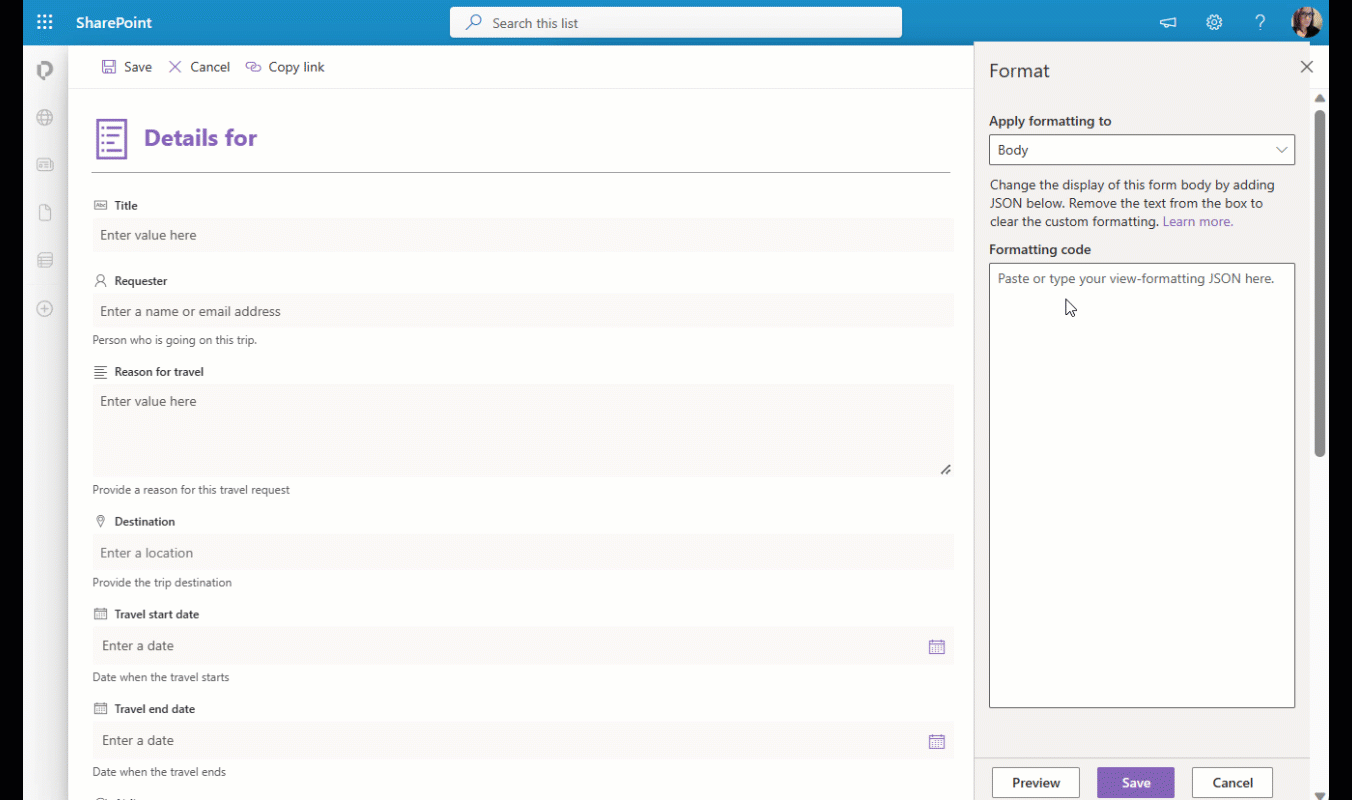
Body
This is the really important part, configuring the body. Again, I recommend using a text editor to store your code as you manipulate it to copy/paste, but here’s the template:
| { "sections": [ { "displayname": "", "fields": [ "Title" ] }, { "displayname": "", "fields": [ ] } ] } |
Then I copy the first section, from the first open curly { to the close curly and comma, }, and paste that for each section I need. Then I go to each section, give it a name, and then specify which columns I want to be in it.
Pro tip: if you change the Language for this file to JSON, it will format it for you and help you determine if your code is valid, but every once in a while code that is valid according to Notepad++ won’t work in the SharePoint window, especially if there are comments in it.
Now to see how it looks in SharePoint. Paste this JSON into the Body section and save. Sometimes the Preview option doesn’t work here, so we save the changes then reopen the form to see the results.
Now you might see that you missed some columns, or you might want to change the order they are in even more. Instead of going back into the JSON, you can now rearrange them from the Edit Columns menu. From here you can drag and drop the columns where you want them. As long as you have Sections created using the JSON in the body section, you can move the columns around and it will update the JSON accordingly. Sometimes I find that I have to rearrange the columns twice before the changes stick, but that isn’t always the case.
Next time, I’ll show you how to use the Edit Columns menu to do conditional formatting!