
This post has been updated to reflect the new name of Microsoft Flow: Power Automate.
Document approval processes are a common business scenario. When we send request document approvals in Power Automate we typically point users back to a SharePoint item or document, but in this post I will show you how to approve a request item and then route its attachments a separate document library.
At a high level the process is:
- Create a request item in SharePoint with an attachment
- Approve or Reject the Request using Power Automate
- Get Attachments and Create Files
Setup Your List
First we need to create a request item in SharePoint. For this you’ll need to have a list created for your users with attachments allowed. Here I created a simple list called “Expense Approvals” where a user can submit expenses incurred during business trips. He or she can upload supporting documentation, which—if approved—will be routed to a library of approved receipts for the Accounting department to reference.
In the Expense Approvals list I added some appropriate metadata for this scenario, such as travel dates and total expenditures. For this example the approval will go to the same person every time, but in another post I will cover incorporating a user friendly list of Approvers to choose from. Finally, I attached a test document to a new item to represent my receipts, spreadsheets, or other documents.

There are a few ways you might choose to create a flow related to this list, and what you pick really depends on your use case. Some folks might want to kick off a flow immediately on item creation, whereas others might allow users to come back to an item later and submit for approval only when they are ready. My favorite way access Power Automate is to do it from right inside the list.
Create a flow from a List
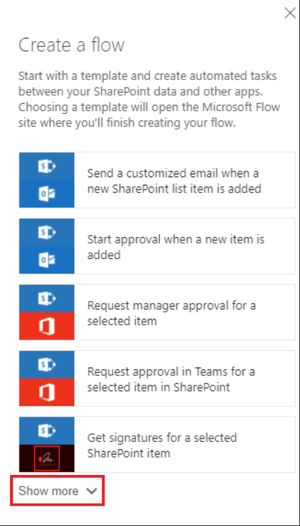
First, click the Flow button inside the list and click Create a flow.

In the right panel, click Show more and scroll to the bottom to find Complete a custom action for the selected item.
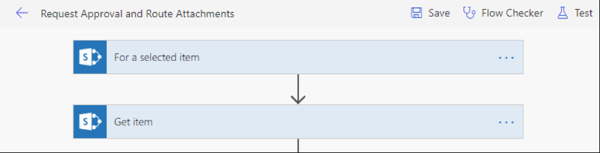
Choosing this template launches Power Automate in a new tab. Power Automate shows you what it’s going to connect to and politely asks you to continue. After you click Continue, it creates a general template for you, but this is enough for you to rename the flow and save. I suggest you do that first before moving on.
Request Approval
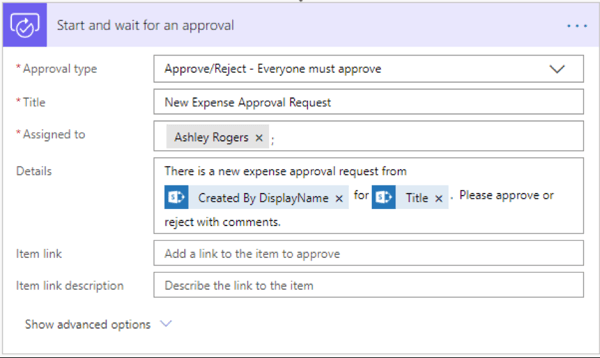
Power Automate sets us up with the information we need for the Approval, and since we don’t want to do any extra work unless the item has been approved let’s set up the approval item and the corresponding condition. This example only goes to one person, so choose “Everyone must approve.” You can also add information to the approval request Details.
Next, add a condition action that relies on the Outcome of the previous approval. If rejected, the condition will be False and will go to the No branch. In that case, send the requester an email with the comments from the approver. If the request is approved, Power Automate can start doing work in the Yes branch.
Get Attachments and Create Files
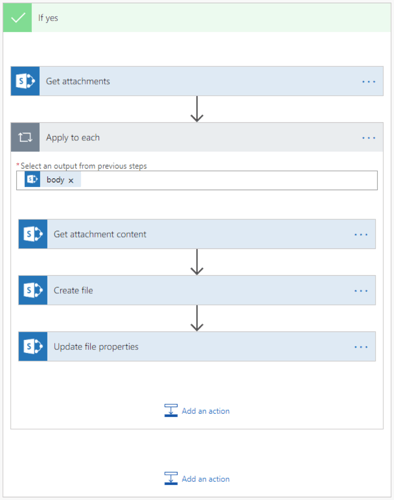
In the Yes branch, start with the Get Attachments SharePoint action to grab all the attachments from the SharePoint item. Next, add the SharePoint action Get attachment content. When you add in the File Identifier, Power Automate automatically creates an Apply to each container for the attachment content in order to capture cases where there are multiple attachments for an item.
Inside the Apply to each container, add the SharePoint action Create file. In this step, create your file in whichever document library is appropriate; I’m using the Shared Documents library in my site for this example. Enter a filename for the new file and add the File Content as the Attachment Content from the Get attachment content action above.
Note: Unless you provide a variable for the File Name, each document is going to be the same name. You can get the original attachment name, but it takes some work to clean that up.
Optionally, add an Update File Properties action after you create the file in order to add some of the metadata from the original request. The complete Yes branch of your approval condition should now look like this:
And now you’re ready to test! Before going live with this it’s a good idea to add a final email notification for the user to let him or her know that the request was approved.
Check back later for more posts where I will cover creating an Approvers list to choose from, creating a button to start your flow, and of course even more interesting Power Automate scenarios!